Breakfast Burgers

A little while ago we found ourselves without bacon (well, the next lot of bacon hadn’t finished curing yet, which is approximately the same thing), but we did have some pork mince. The obvious thing to do was make breakfast burgers!

The patty recipe is based on this Grilled Pork Burger recipe, but I got rid of the breadcrumbs and changed the herbs a bit. The ingredients are as follows:

  • 2 small eggs
  • 3 good size handfuls of grated parmesan cheese
  • 1 large handful fresh parsley, diced
  • 1/2 teaspoon salt
  • 1 tablespoon garlic powder
  • 1kg pork mince

To prepare the mince, crack the eggs into a large bowl and whisk briefly with a fork. Add the parmesan, parsley, salt and garlic powder, and keep whisking until it’s evenly mixed. Add the pork mince and mix it the whole lot up thoroughly with your hands. You can put cling wrap on top and keep the mix in the fridge, then dig out and form into patties on an as-needed basis over the course of a few days.

For the breakfast experience, you will need:

Slice the onions and cook in a pan with a bit of lard, oil or butter (whatever you have handy). Once they’re on the way, heat an electric hotplate (or separate pan), and put the patties on. 180°C works well. Again, use a little lard, oil or butter to avoid sticking. The patties want 4-5 minutes per side. After you’ve flipped them for the first time, wait 2 minutes, then cover with grated cheese, which will proceed to melt. Fry some eggs while you’re waiting for the patties to finish (hint: fry in butter until mostly cooked, then put a lid on briefly which will just seal the tops with steam, and leave the yolks runny). Finally, the onions go on top of the cheese-covered patties, and everything goes onto plates.

Bon appétit!

On Nature

I came across an article the other day entitled Humanity ‘Sleepwalking Towards the Edge of a Cliff’: 60% of Earth’s Wildlife Wiped Out Since 1970, and while I applaud the thrust of the article (we’re collectively doing a great deal of damage, and may ultimately wipe ourselves out), the framing, like so many other pieces of this type, is all wrong. Consider this quote:

“human activities are destroying nature at an unacceptable rate, threatening the wellbeing of current and future generations”

The statement about our future notwithstanding, this reduces “nature” to an external thing that we have some sort of power over, when in fact the exact opposite is true.
Nature is not separate from humanity, it’s not an amenity or a tourist attraction, it’s not something we just experience on the weekends, a place we choose to go camping, or to dump our garbage in when nobody is looking.
Nature is a vast cyclical process of life and death, of which humanity is just one relatively insignificant yet insufferably arrogant piece. We each participate in it, all day, every day.
Nature is the song that surrounds us now, and one that will carry on well after we are gone.
We need to listen to that song, and learn to sing along with it.

Wildlife Monitoring

In December 2016 we participated in a community wildlife monitoring program, run as a collaboration between the Tasmanian Land Conservancy, Kingborough Council, the Bruny Island Environment Network, Bruny Island Community Association, Private Land Conservation Program, NRM South, Derwent Catchment NRM, BirdLife Australia and the University of Tasmania. The idea is to establish a network of long-term wildlife monitoring sites on private land, to figure out what lives where and how our native animal populations are faring over time.
For us, this meant setting up a wildlife monitoring camera for a few weeks, and taking an audio recording of bird calls one morning for about 20 minutes. At the end of the period we went through the photos, deleted the irritatingly large number of photos of moving shadows and vegetation, and recorded the actual wildlife spotted in a spreadsheet. The same thing is being done on many different properties over a wide area. The results of the research from this pilot program should be available some time this year (2017), and hopefully another round will be done in future at the same sites to see what’s changed over time.
Aside from the small family of skinks living in the log the camera was pointed at, we got photos of some combination of pademelons, Bennetts wallabies, spotted-tailed quolls, eastern-barred bandicoots, bettongs, brushtail possums and at least one echidna. Here’s some choice shots:
IMAG0006IMAG0247 IMAG0715 IMAG1341 IMAG1672a IMAG2442
…and here’s a video of the entire set of interesting photos, one frame every two seconds to make everything reasonably easy to identify:

Finally, if you’ve got a pile of JPEG images you want to turn into a video like the above, and you’re running Linux, something like this should do the trick:

# ffmpeg -f image2 -framerate 25 -r 0.5 -i %*.JPG -s 640x480 my-video-file.avi

How to Make Rough Cider

Rough cider, or scrumpy, is trivial to make at home, and delicious. All you need is apples, a means of juicing them, and a source of yeast. For that matter, it’s trivial to make anything beer-like in strength. I’ve never understood jurisdictions that prohibit or limit home brewing – as is pointed out in the rather excellent Sacred and Herbal Healing Beers: The Secrets of Ancient Fermentation, if you want 5% alcohol, you can get it by combining four litres of water, half a kilo of sugar and some yeast.
20161211_211506
Continue reading

A Dam Intake That Doesn't Suck

We live on a fairly steep hill. The house is slightly more than 340 metres above sea level, and there’s a large dam half way up the length of the property, at an altitude of about 370 metres. Some clever person installed a run of one inch diameter poly pipe from the dam down to the house with various tap fittings along the way, so we’re able to use gravity fed dam water in troughs for animals, and to water the garden beds, and even inside the house to flush the toilets (which is much better than wasting potable tank water).
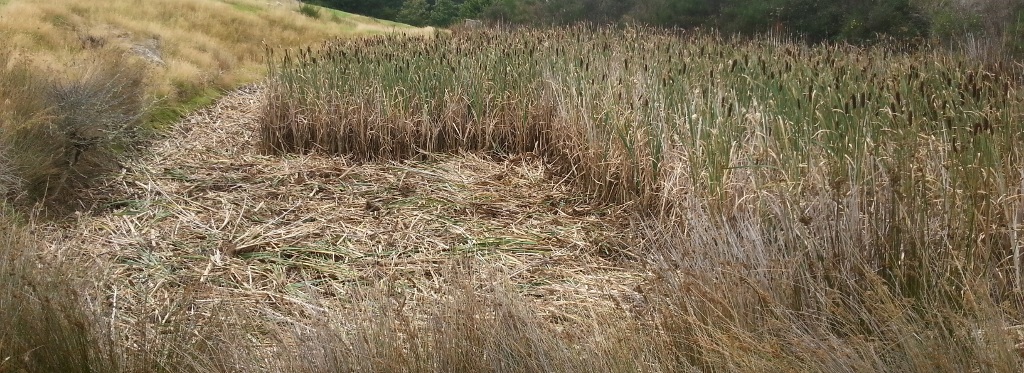
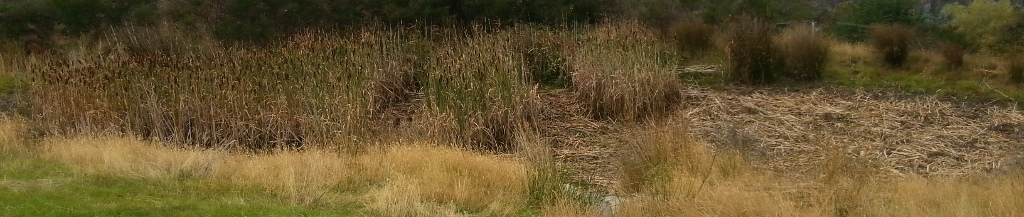
Given the abysmal rainfall in recent months, the dam is the lowest we’ve ever seen it. The last time it got close to this low was during what I like to call the “eight month summer” of 2012-2013. So the water level has been receding towards the intake for the pipe that goes down the hill, and that intake was only a couple of metres from the edge of the dam, and sitting on the dam floor where all the silt, sediment and weeds live. On the Easter long weekend, while watering down by the house, the feed from the dam stopped. The water pressure had actually been poor for some time, but it was then that we completely lost the siphon action. Time for a new dam intake.
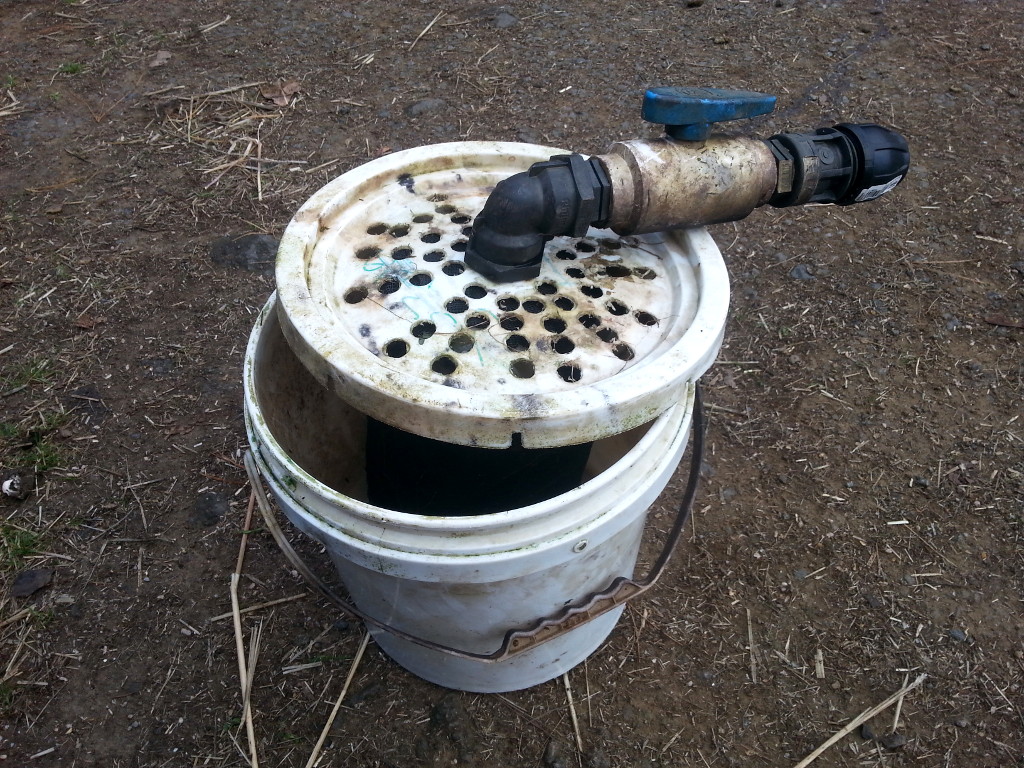
The existing intake consisted of a bucket with holes drilled in the lid, containing a fish pond filter, with a tap and pipe coming out the top. There were rocks in the bottom of the bucket to weigh it down.
20160328_163952This is not ideal. Really, you want the intake to be close to the surface of the water where crap won’t get sucked up, so we went and bought a 200mm polystyrene float and a foot valve, which looks a bit like this. That’s probably not the exact model I purchased, but you get the idea – it’s a grille over a ball valve with a spring, which allows water to be sucked out of the dam, but if you have to pull the intake out of the dam to clean or inspect it, the valve won’t let water flow the other way, so you don’t risk losing the siphon.
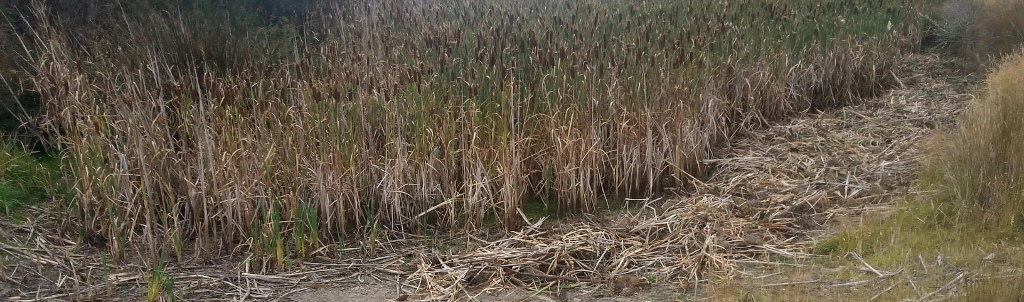
Conveniently we had an extra length of 1″ poly pipe lying around, so I attached the foot valve and float to the end of that and was able to extend the feed further out into the middle of the dam. Turns out I did need to lash a small rock to the end of the pipe to hold the foot valve under the water, but it’s now just slightly below the surface as opposed to slightly above the dam floor, so the water is much cleaner.
20160328_164525
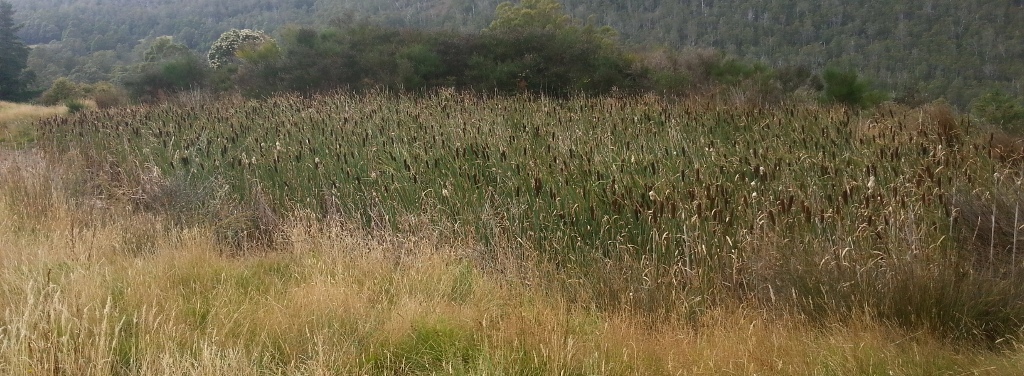
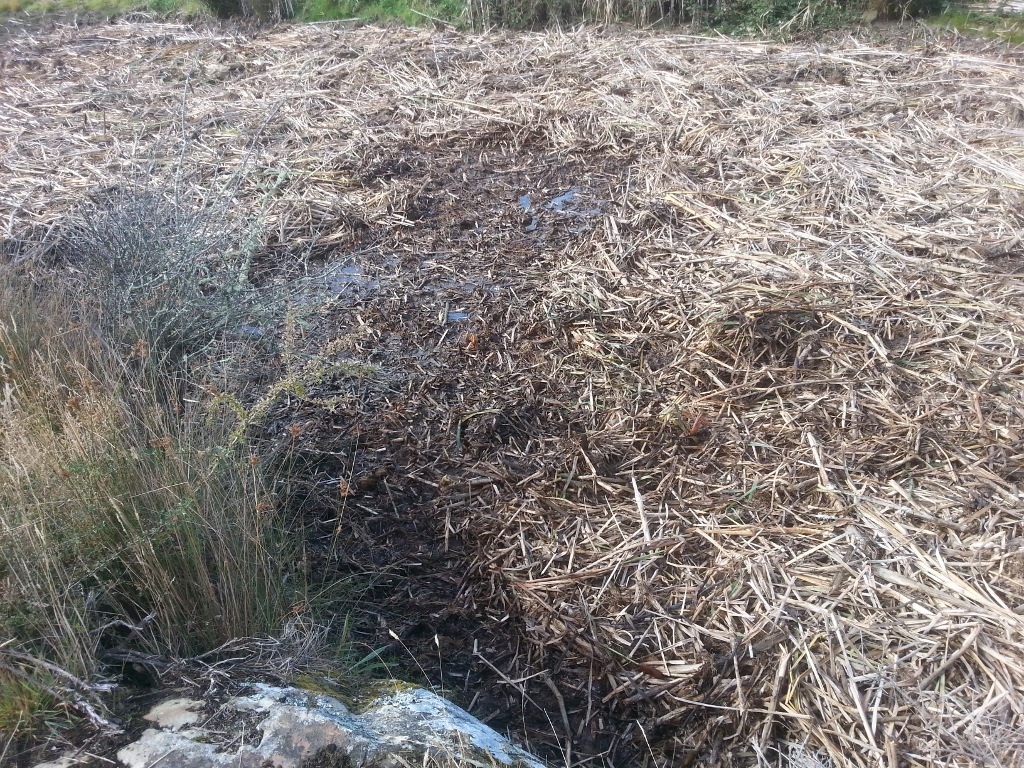
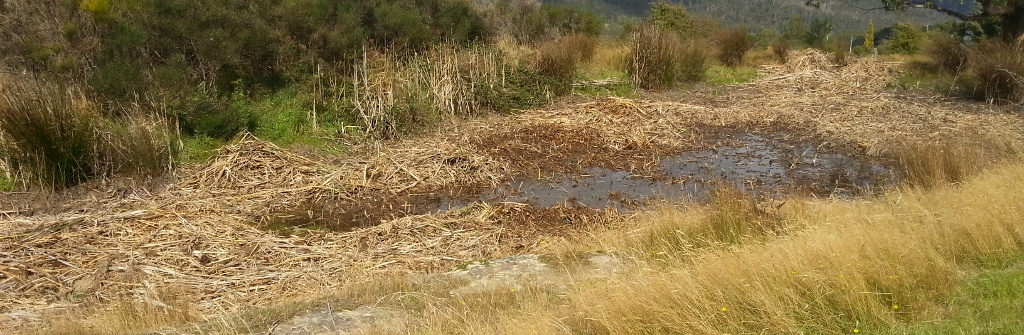
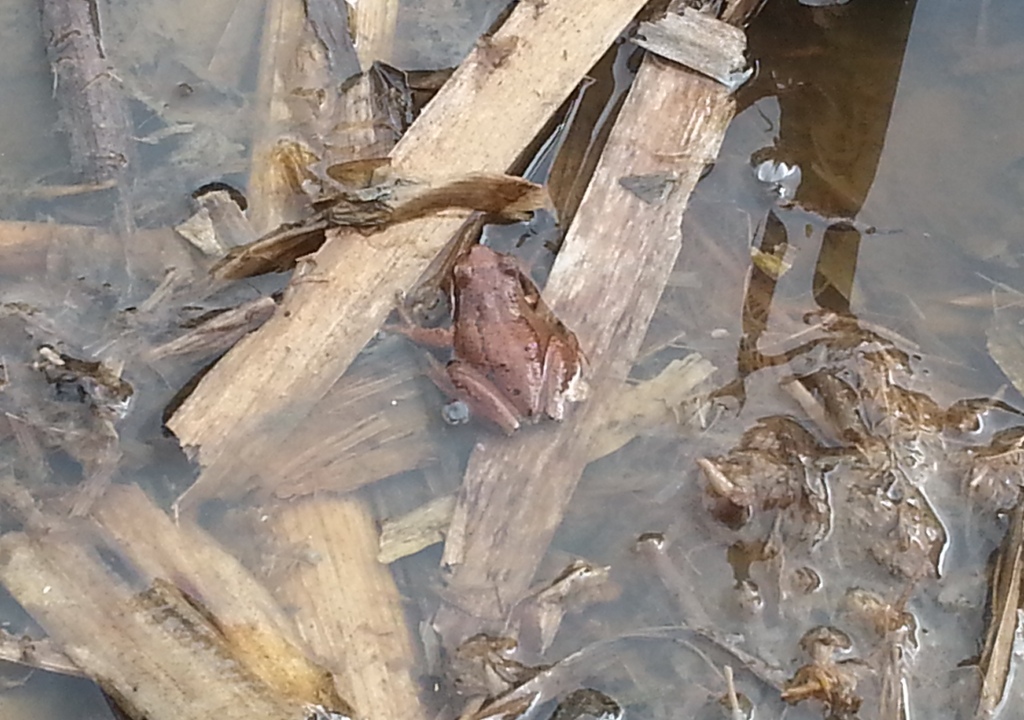
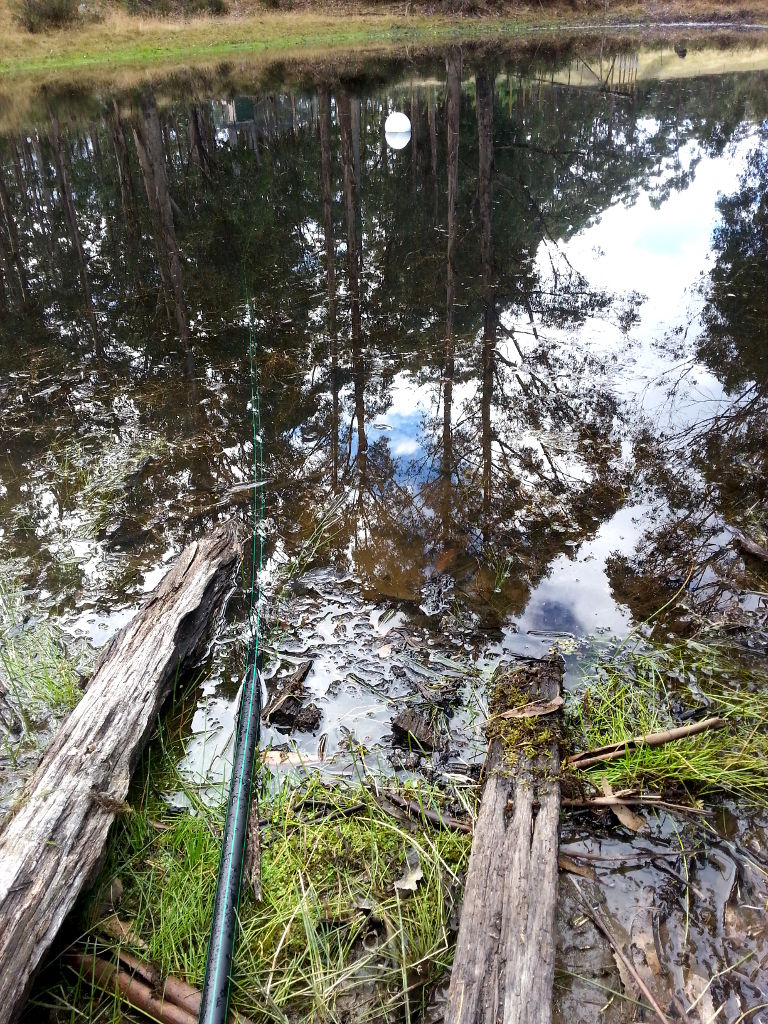
In the above photo, the white ball is the float. For comparison, the old bucket intake was pretty much where the end of the left-hand chunk of wood is.
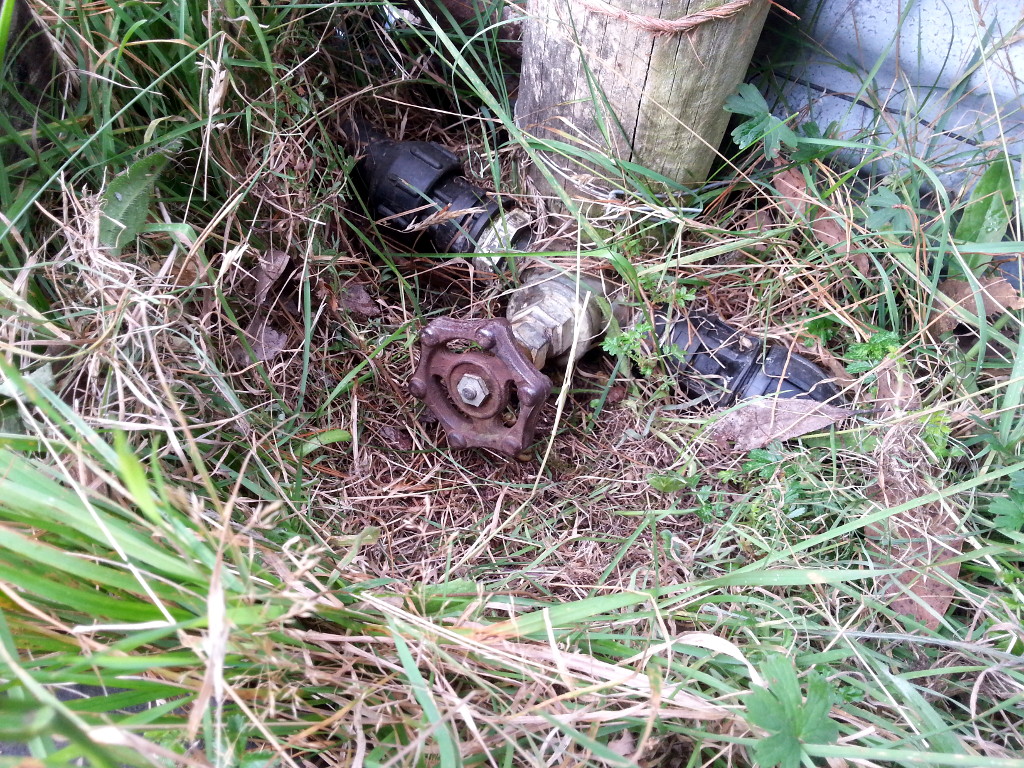
Then came the fun part — restarting the siphon. There’s a gate valve a little way north of the house above all the other taps that feed off the dam pipe, so I closed that, then went back up to the dam.
20160328_164216The pipe that leaves the dam goes over a rise, but there’s a convenient join in the middle, so I disconnected the pipe there, and we put a funnel made from an old juice bottle into the pipe that runs down the hill. Morgan held this end up high, while I got buckets of water from the dam and poured them into the funnel to re-fill as much as we could of the ~170 metres of pipe. The amazing part about this is how the water behaves. You start pouring it in, it slowly goes down the funnel and disappears. Then a few minutes later there’s gurgling noises as air works its way back up the pipe, half the water you poured in is forced back out of the pipe into the funnel, then it all subsides again. It’s actually a lot of fun, and of course you end up soaking wet due to various minor mishaps.
Once we figured no more water was going down the pipe, we reconnected it to the intake at the top of the rise, then I went back down to the house, opened the main gate valve, turned on a hose, and water… came… out… very… slowly… There was sporadic coughing and spluttering from the pipes as air shunted around, but I was worried we hadn’t put enough water in to kickstart the siphon properly. So I went to the filter a few metres down from the main gate value and unscrewed the bottom cap.
20160328_164126
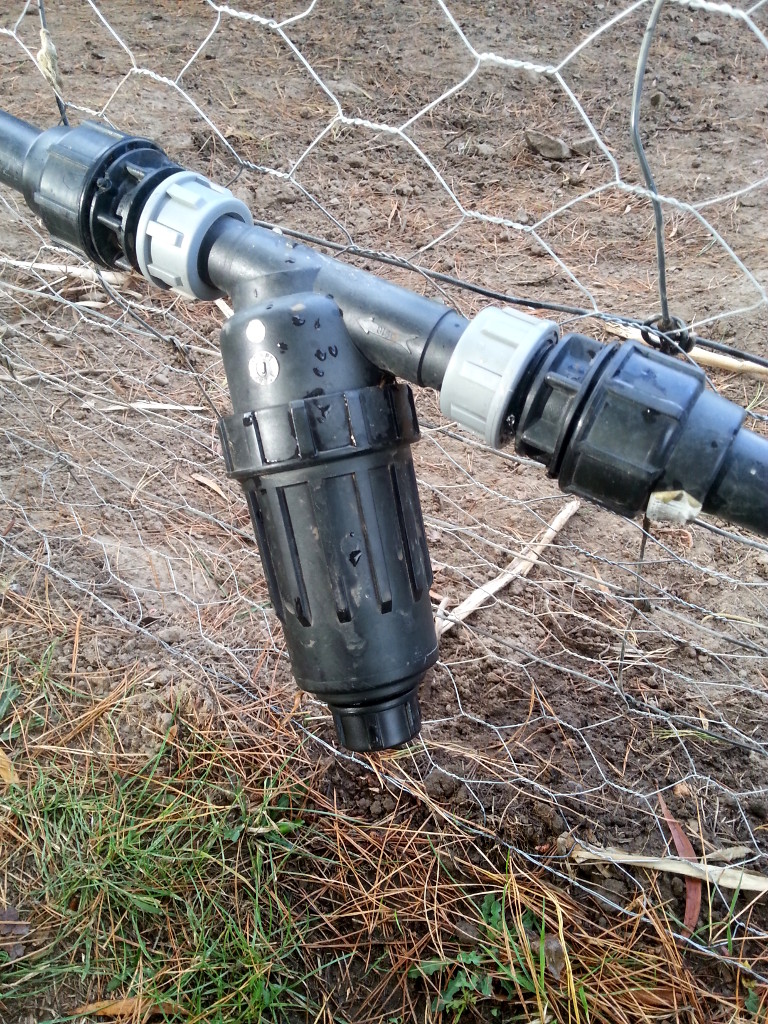
This presumably created the clearest, widest flow of water/suction possible. When the flow slacked off, I put the palm of my hand over the bottom to seal it and waited until the water pressure built up again. Once this became slightly uncomfortable, I removed my hand and water blasted out. I had to repeat this maybe half a dozen times until (I assume) all the air was bled and proper pressure restored.
Then it was back down to test the lower taps on a couple of garden beds, which showed better water pressure that we’ve seen any time in the last few years. I call that a win.
For my next trick, I’ll replace the main gate valve. The damn thing seems to have developed a small drip.

Yeah, I Can Do That

There’s a spring-fed dam down the bottom of one of our paddocks which used to have plenty of water, and a few bulrushes. After what I’ve dubbed the “eight month summer” from October 2012 to May 2013 (i.e. eight months of below average rainfall), most of the water in the dam was gone, and there were rather more bulrushes. Flash forward to the end of last summer (approximately February 2015), and we had all the bulrushes and no bloody water.
01-all-the-bulrushesWe figured either the dam was leaking, or the bulrushes were drinking up the water. Seeing as there wasn’t any water in the dam, I though it’d be an ideal time to pull the bulrushes out; relatively easy access, and once we get some more rain through winter, we’ll be able to figure out what the dam is doing one way or another. Having pulled out a small patch of bulrushes over the course of ten minutes or so, I thought to myself: how hard could it be? (The astute observer will note that this is a weak form of the deadly old rhetorical “what could possibly go wrong?”)
For those who have never experienced bulrushes first hand, they are a reed up to a couple metres tall, with a stalk anywhere between 3-10cm at the base, and as far as I can tell, they grow in maddeningly sticky mud. Apparently parts of them are directly edible, you can use them to make flour, and I suspect you can even brew beer from the roots with some effort, but that’s a project for another time. Any individual bulrush is not too much of a pain to pull out of the ground, assuming some upper body and/or arm strength. So I decided to spend half an hour each morning pulling ’em out, and dropping them in place, so I could stand on the resultant reed mass to get to the ones in the middle of the dam where the ground becomes seriously boggy. Here’s a photo of the swathe I cut down the north side of the dam over the first day or two:
02-swathe-north-sideIt’s important to note that we don’t own any heavy machinery suitable for this task, so the entire job was done solo, by hand, in gumboots and gloves. After about a week, it was starting to look like an impressive impact (note – this photo is facing back the opposite direction from the previous photo):
03-week-oneAfter two weeks I got bored with dropping flat areas, and decided to make a few paths to liven things up:
04-boredAfter about three weeks, I had the whole lot down, if you ignore a couple of small patches above dam height that are embedded in blackberries:
05-all-downThe next task was to get all that crap out of the dam. Again, handwork (just drag the damn bulrushes outta there), but I did find a heavy rake useful. Later, after the rake broke, I resorted to a hoe for lighter dragging. Here’s the middle of the dam after a few days:
06-middle-with-waterAnd after about another week:
07-another-weekThere were frogs and spiders. I managed to photograph one of the frogs:
08-frogFinally, after seven weeks in total:
09-clear-0109-clear-02It’s basically clear now; there’s a smattering of bulrushes attempting to regrow, but I have high hopes that it should at least be manageable now if we keep on top of it.
It sounds pretty impressive to say this was a forty-nine day project, but it was actually “only” about twenty-five hours work. On the other hand, if I’d attempted to do the whole twenty-five hours back to back, I’d probably be dead now.
In other news, we have several piles of semi-dried bulrushes:
10-pilePossibly we should investigate basket weaving.

Amazing Bread

This is the simplest – and at the same time possibly the best – bread recipe I have ever made. No kneading, no bread machine, and you get good bakery-quality bread for something like $1 per loaf, assuming you’re buying flour in 5kg bags. Here’s a handy how-to video:

If you’re more textually inclined, read on. You will need:

  • 2 + 2/3 cups warm water
  • 2 tsp salt
  • 1/2 tsp yeast
  • 5-6 cups plain flour
  • A little bit of extra flour – rice flour is excellent, but whatever you’ve got handy will be fine
  • A cast iron pot with lid (or possibly a casserole dish if you don’t have a suitable pot)
  • Patience, because you have to leave the dough overnight – this is not instant gratification bread, but it’s worth the wait

Put the water in a bowl, sprinkle in the salt and yeast, and stir until everything is dissolved. Add the flour – you want somewhere between 5 and 6 cups, the aim being to create quite a sloppy dough. Mix it all together with your hands, but just for long enough so that it’s even. More flour gives a firm dough which in turn will result in a very dense loaf, whereas less flour makes for fluffier bread, so really the moister the better (Morgan insists that “moister” is not a word, but I think it’s perfectly cromulent). If the dough sticks annoyingly to your hands, it’s a good sign.
Once the dough is mixed, cover the bowl with a damp tea towel and put it in a warm place for 18-24 hours. On top of (or even inside) a rack of computer equipment is ideal, but if you don’t have one of those, a warmish room will work fine. The tea towel will dry out eventually, so make sure to keep it damp, say, with a spray bottle of water, or just take the towel off the bowl and run it under a tap.
After 18-24 hours, tip and/or scrape the dough out of the bowl, and roll it around in some more flour. Bonus points for folding it a bit and ending up with a nice round ball shape. Rice flour is excellent for this part of the process, because it gives the loaf a nice golden outer crust. Put the dough back in the bowl under the tea towel for about another hour.
Finally, the baking. Put a cast iron pot with lid in the oven and preheat to 250°C. If your oven won’t go that high, just put it on maximum. Once oven and pot are nice and hot, wrangle the dough into it, put the lid on, and bake for 35-45 minutes. I usually set a timer for 35 minutes, then pull the bread out and stab it with a knife to see if it’s done. If the knife comes out clean, you’re good. If there’s a bit of sticky stuff on the knife, return the bread to the oven for another 5-10 minutes.
Once it’s done, take the loaf out and let it cool on a rack for a little while, then eat and enjoy!

Amazing Bread

The finished product (rice flour variant)