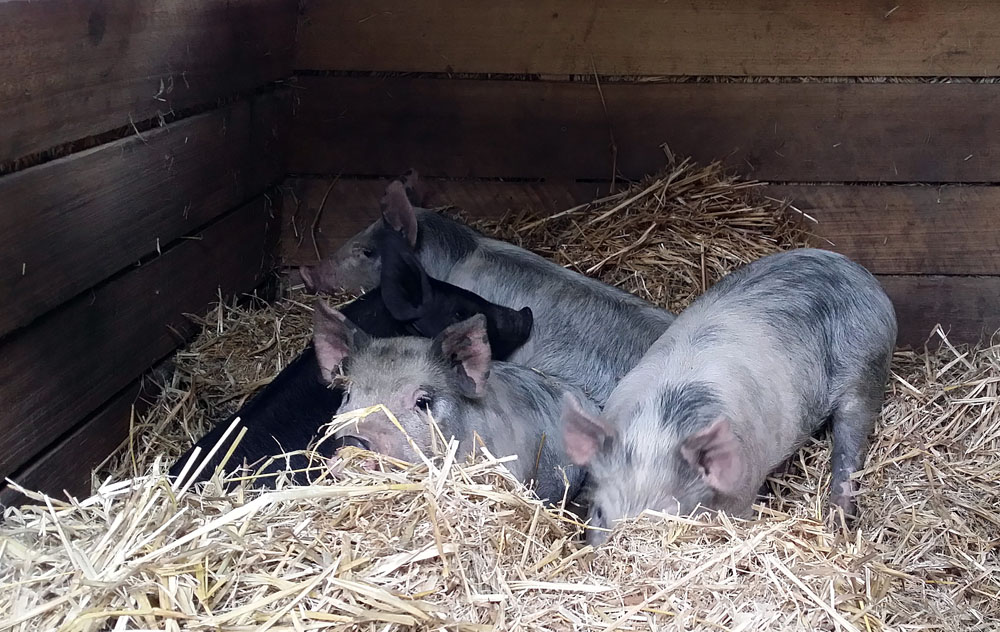
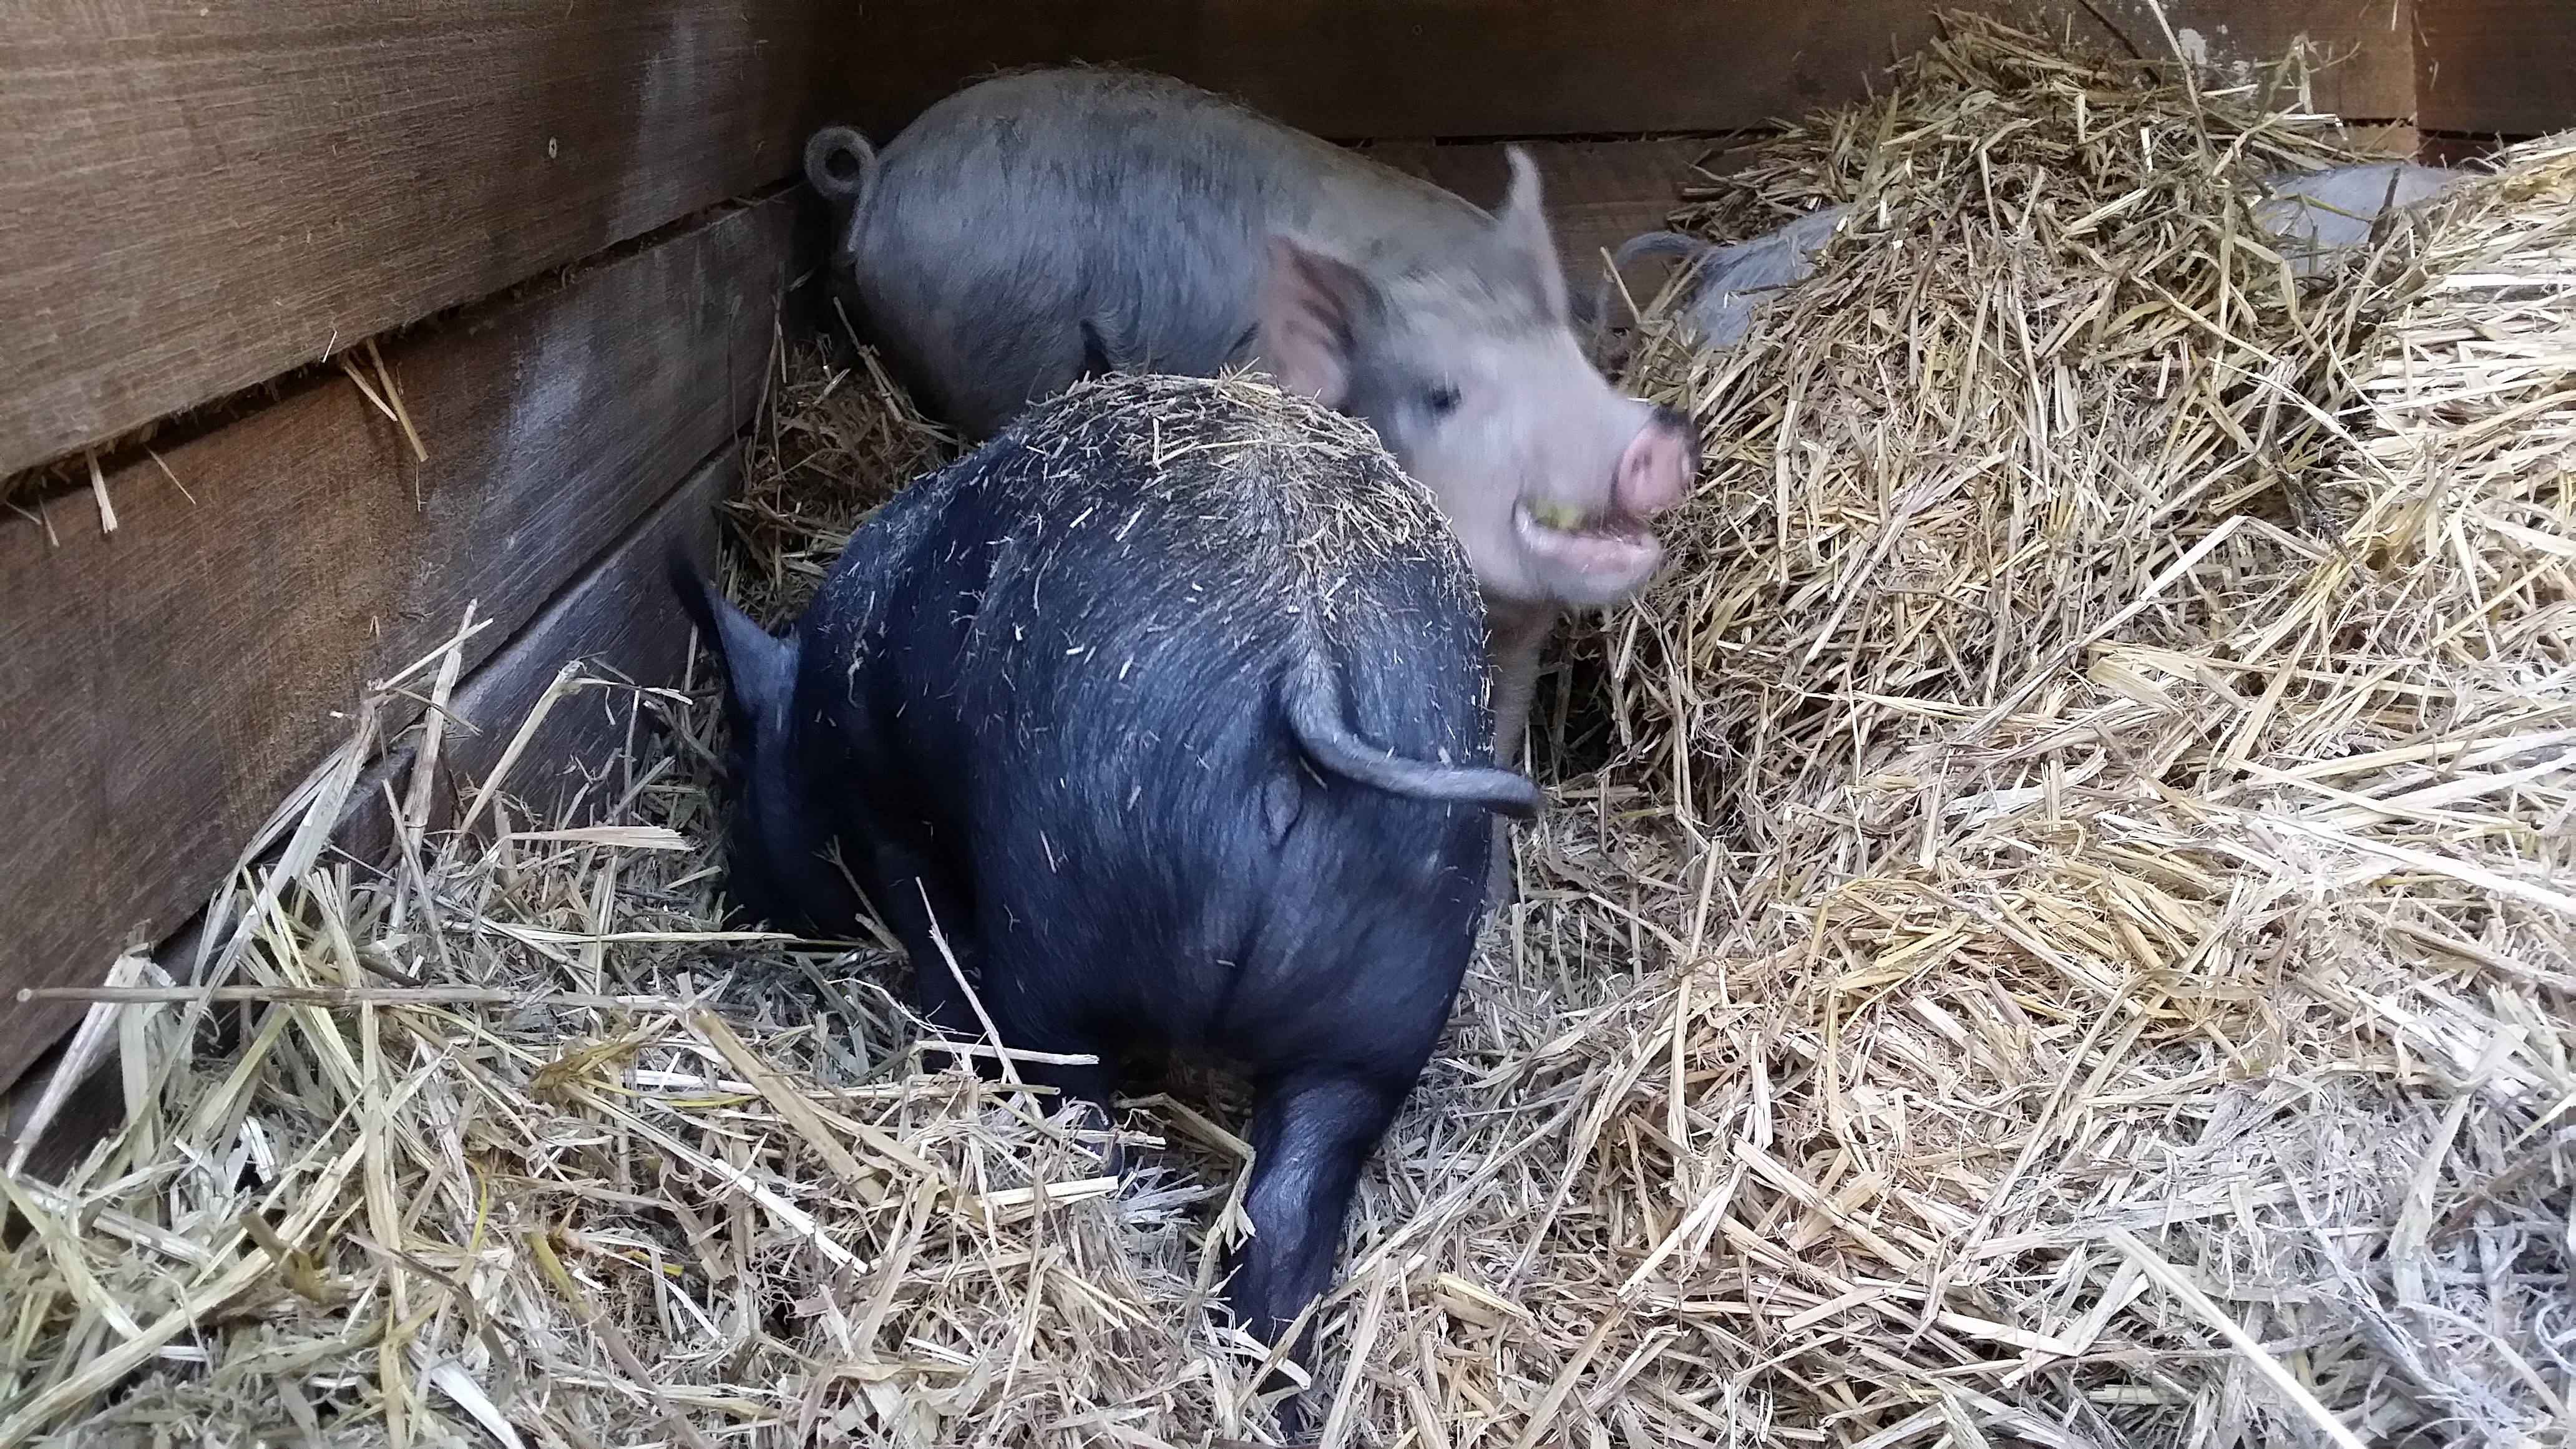
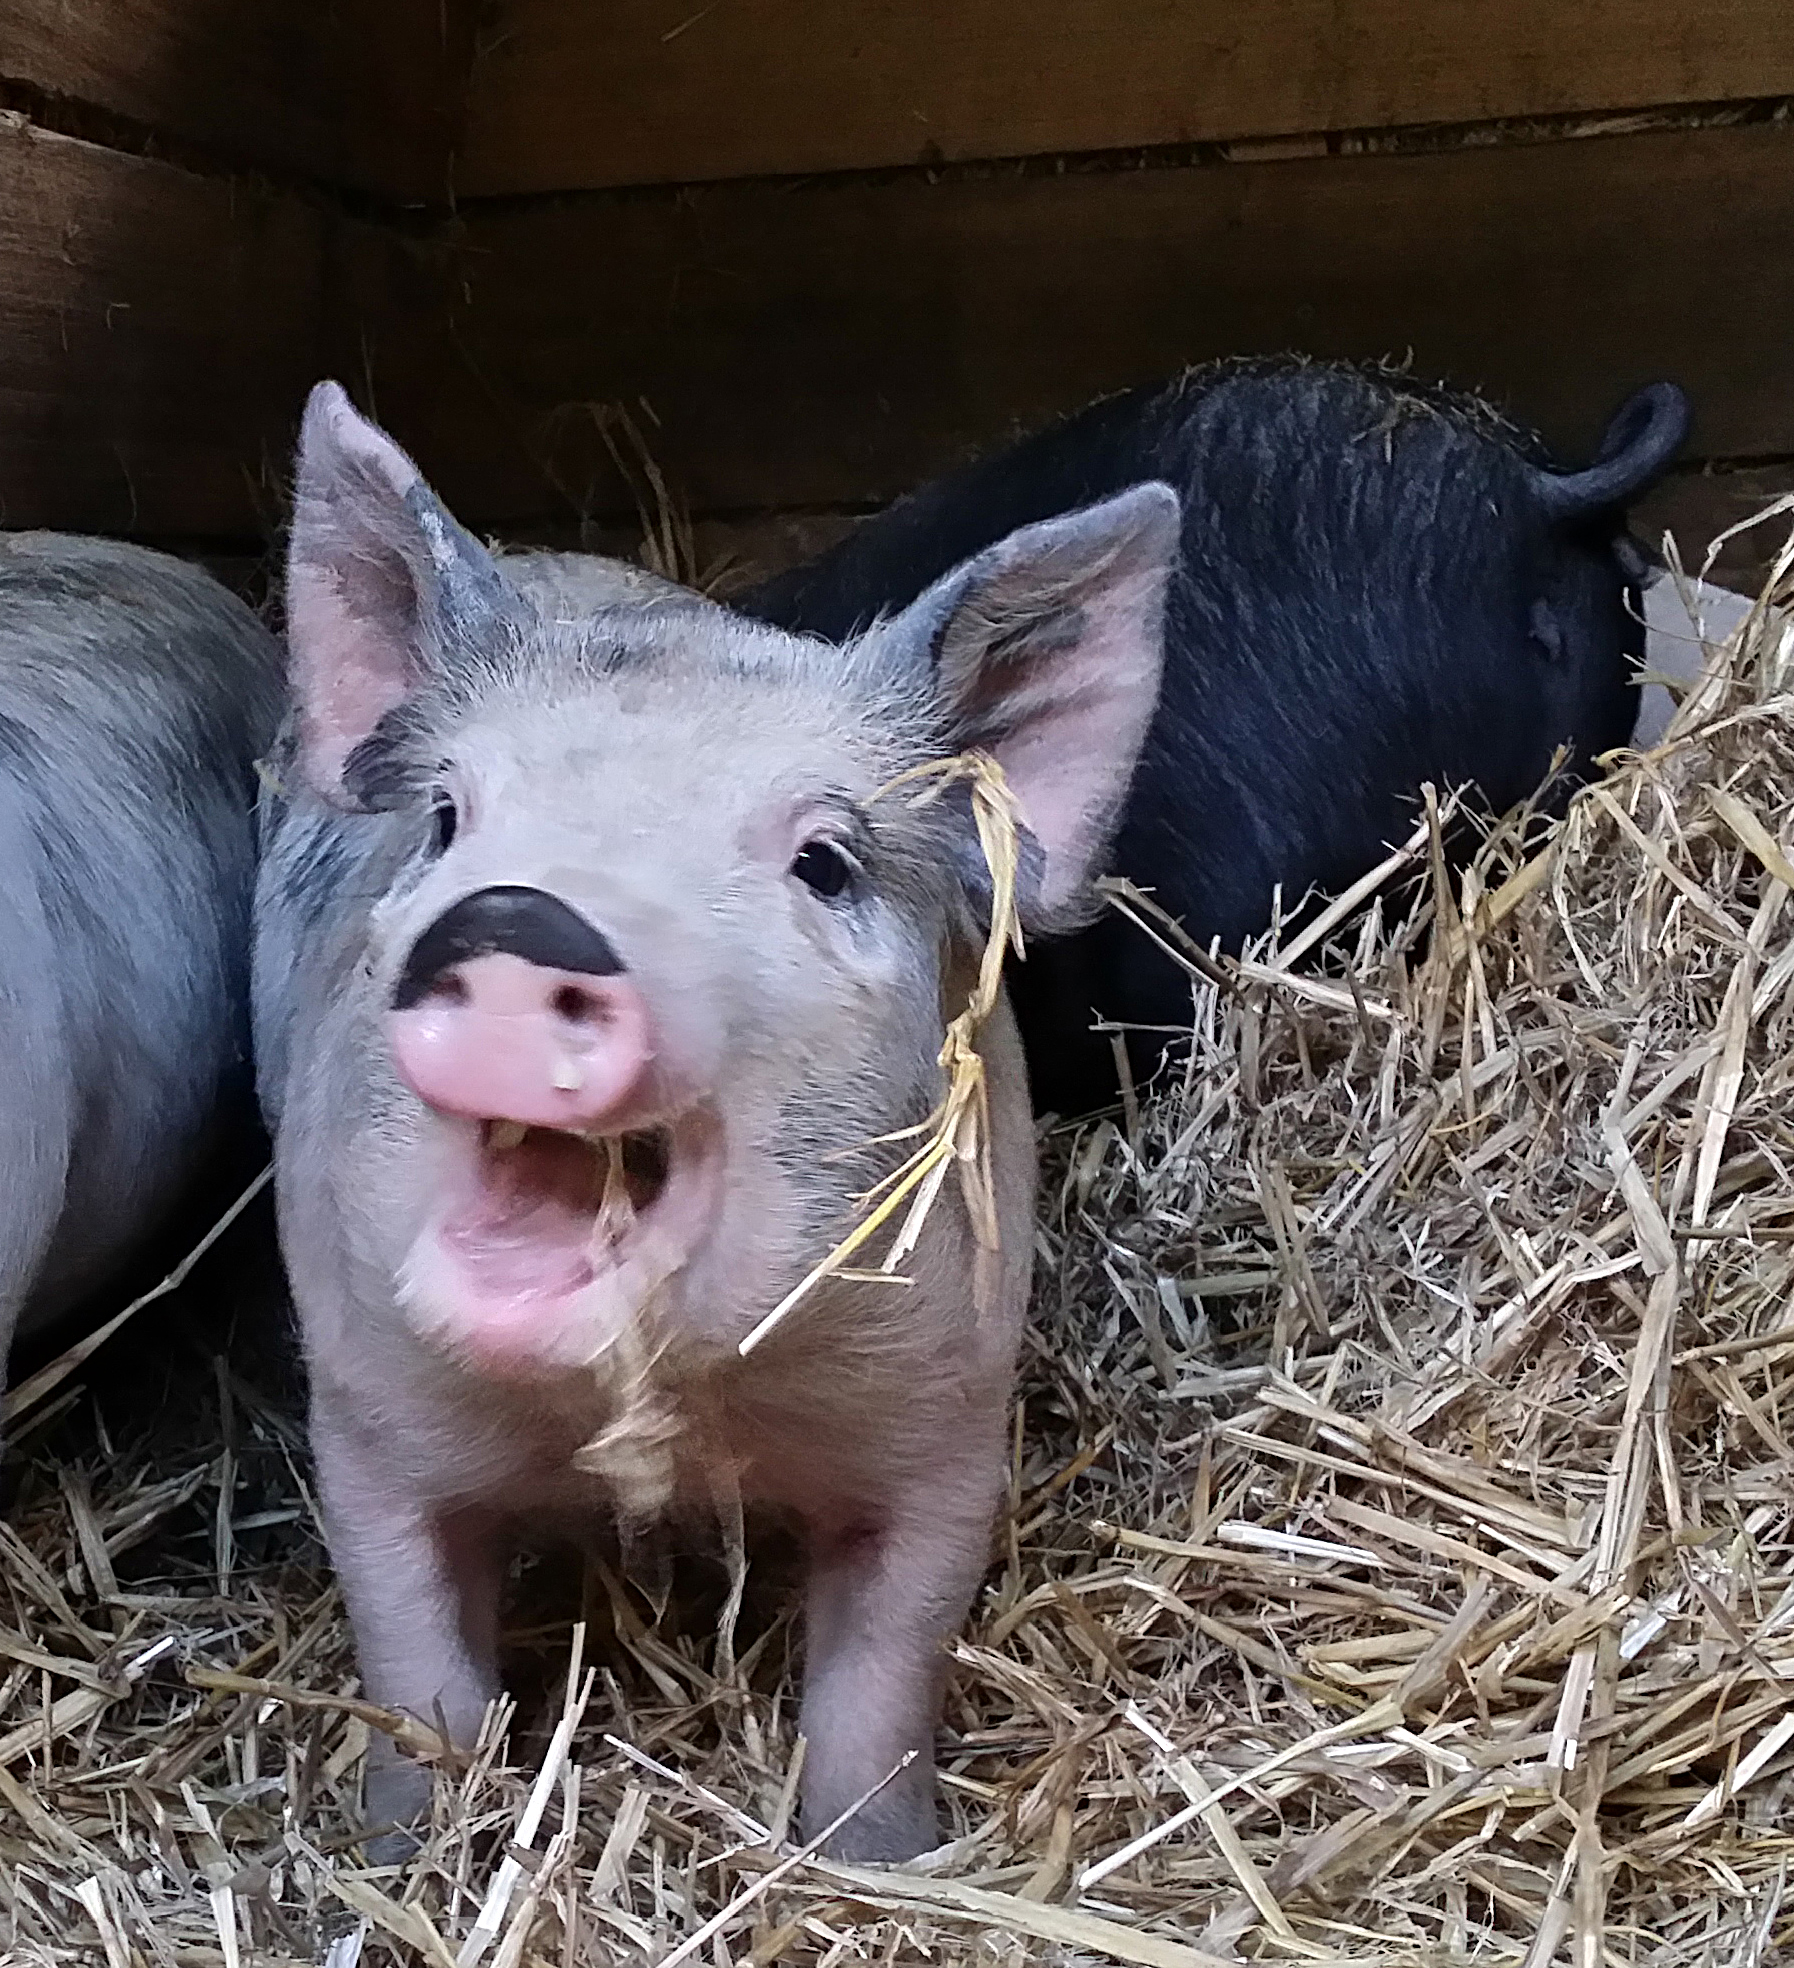
We are very happy to again have pigs. These guys had just been tackled by a couple of large humans and put in a box which was put on top of a ute for the longest drive they have ever had. Then we had to get them from the box to their house. This meant individually picking them out of the box and carrying a squirming, squealing (loud – oh so loud – no really – really fucking loud) creature across a paddock. Despite being only eight weeks old they are remarkably strong and determined. Here they are, ensconced in their fancy pig house wot we made. Notice that it has double walls which are insulated with straw in between the two layers of the walls. It’s cold here.
“Doesn’t look very fancy” you say…
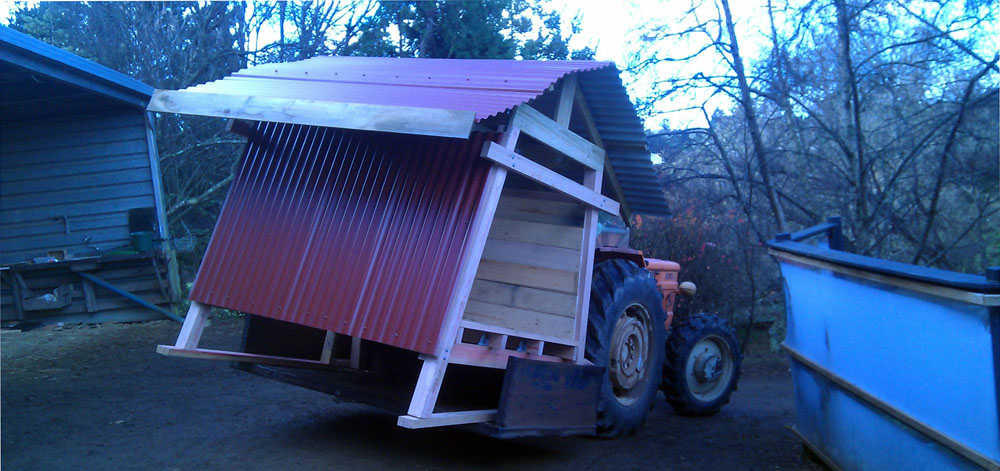
Here is a photo of it being moved from the shed where we built it down the hill to where it lives now. Please do not notice the dodgy arse way we have loaded it onto the carry all.
“What kind of pigs are they?” you ask. The very nice lady we bought them from told us the mum was a Saddleback and the dad a Berkshire. The mum was all black and we didn’t see the dad. The pig on the right in this photo is a Saddleback. They are a black pig with white across their shoulders and forelegs.
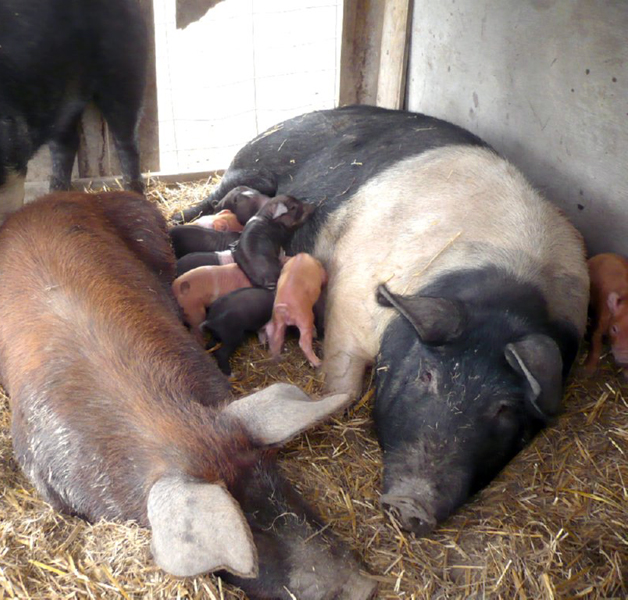
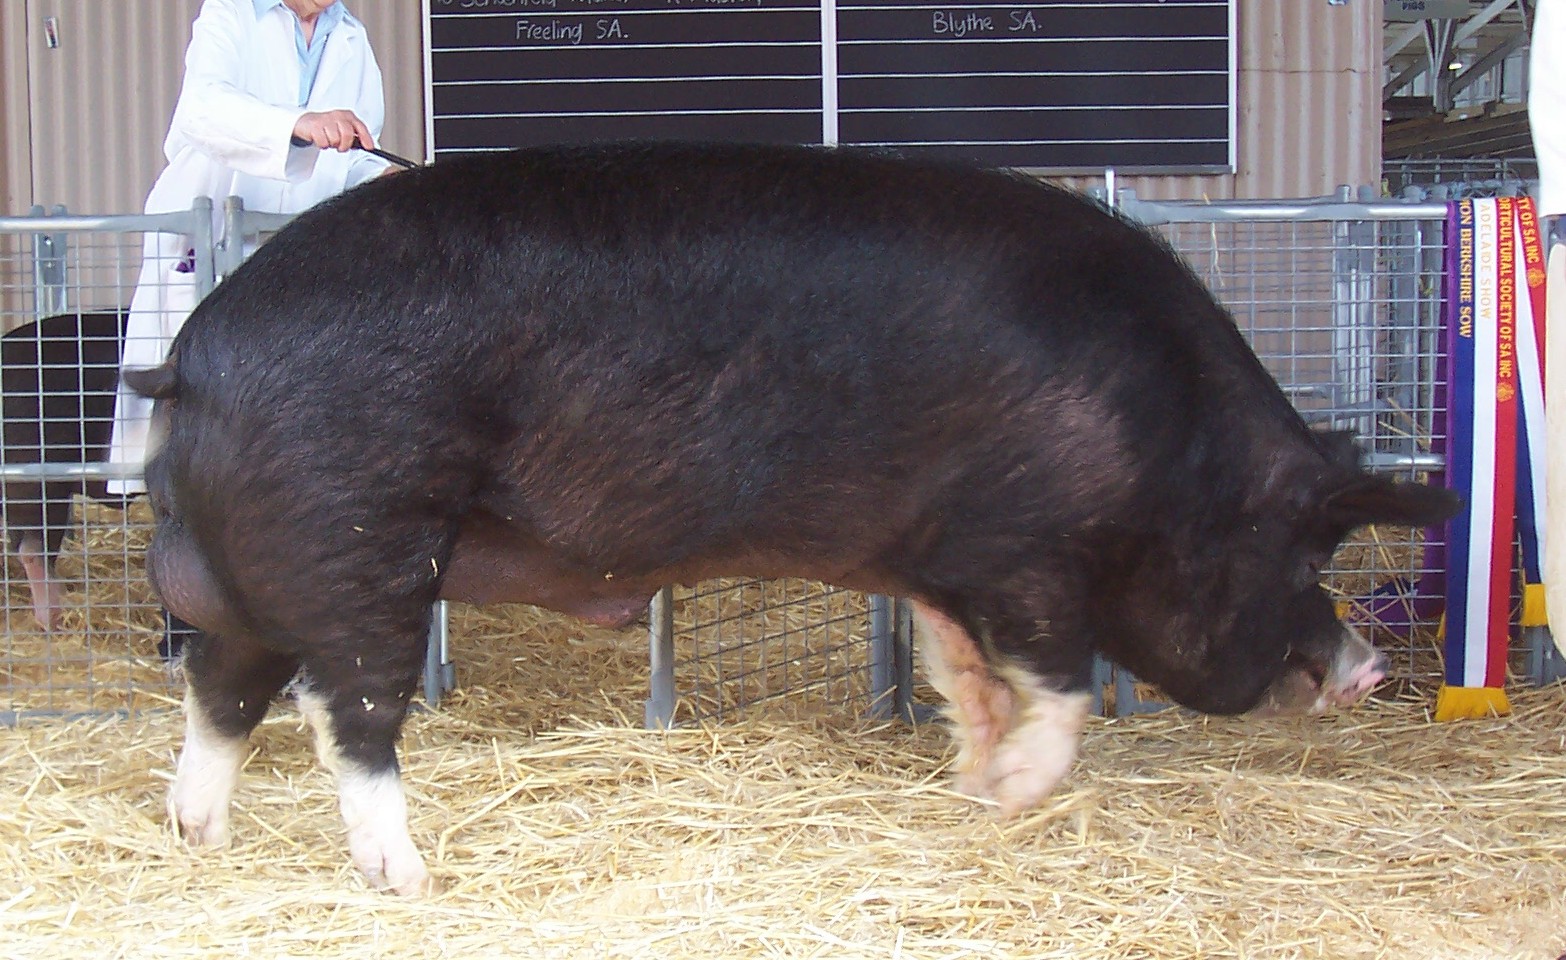
The pig in this photo is a Berkshire pig. They are a black pig with white feet.
We have one all black pig (female) and three black and white pigs (two males and one female). Not saying they aren’t exactly as advertised but… I suppose it’s possible… The main thing is they are healthy, well formed pigs.
They settled down after we had put them in the house which is packed with barley straw. Straw is better for use in animal houses than hay, as hay has too much moisture and will go mouldy quickly. Barley or oaten straw are preferable to grass straw as they have substantially greater nutritional value. Lots of straw to start with is great as it gives them somewhere to hide when they are feeling uncertain of their new surroundings. Also it keeps them really nice and warm, it’s going to be 3 degrees celcius overnight tonight and 12 to 15 tomorrow.
Soon there were apples and they began to realise we weren’t all that bad. Though they were still keeping a good eye on us.
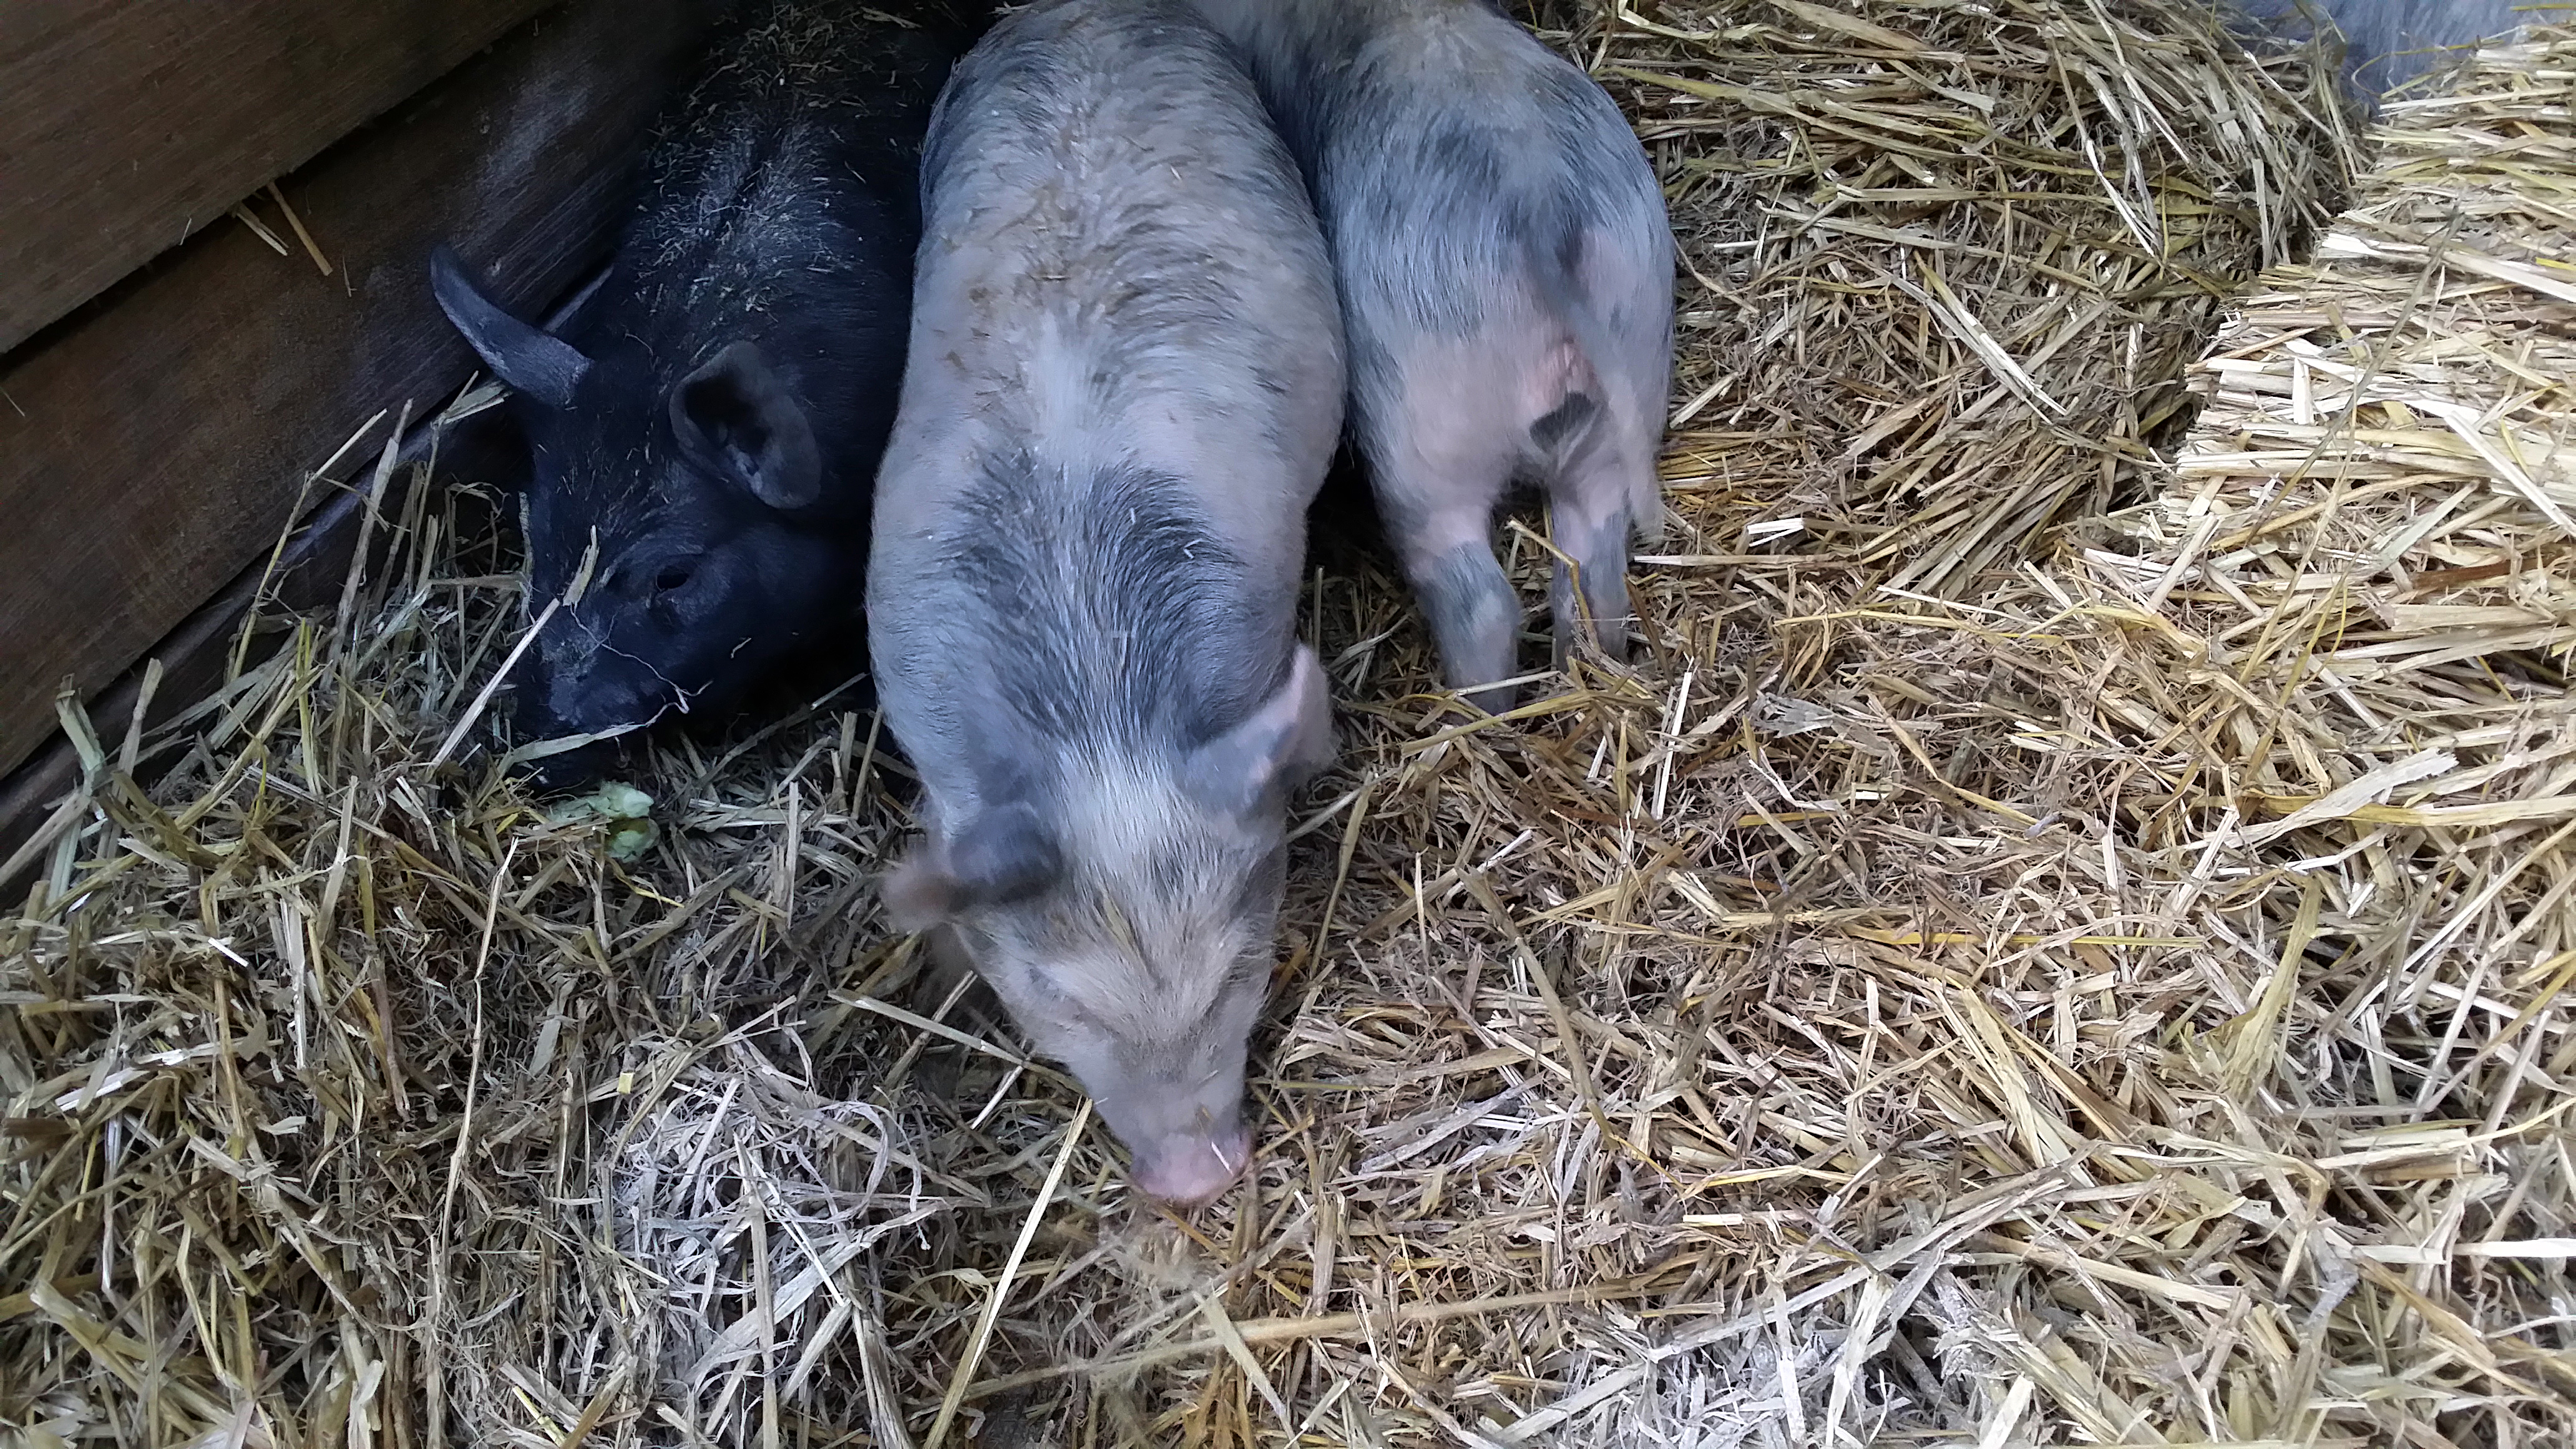
Looking at them from behind made me think they look a lot like hippos.
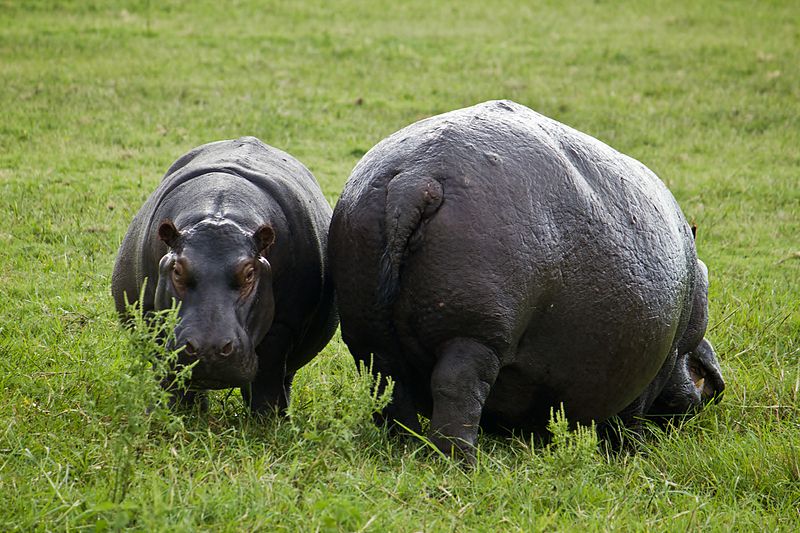
In fact hippos were originally first classified as being most closely related to pigs, because of their teeth. But later DNA evidence revealed they were actually most closely related to cetaceans [1].
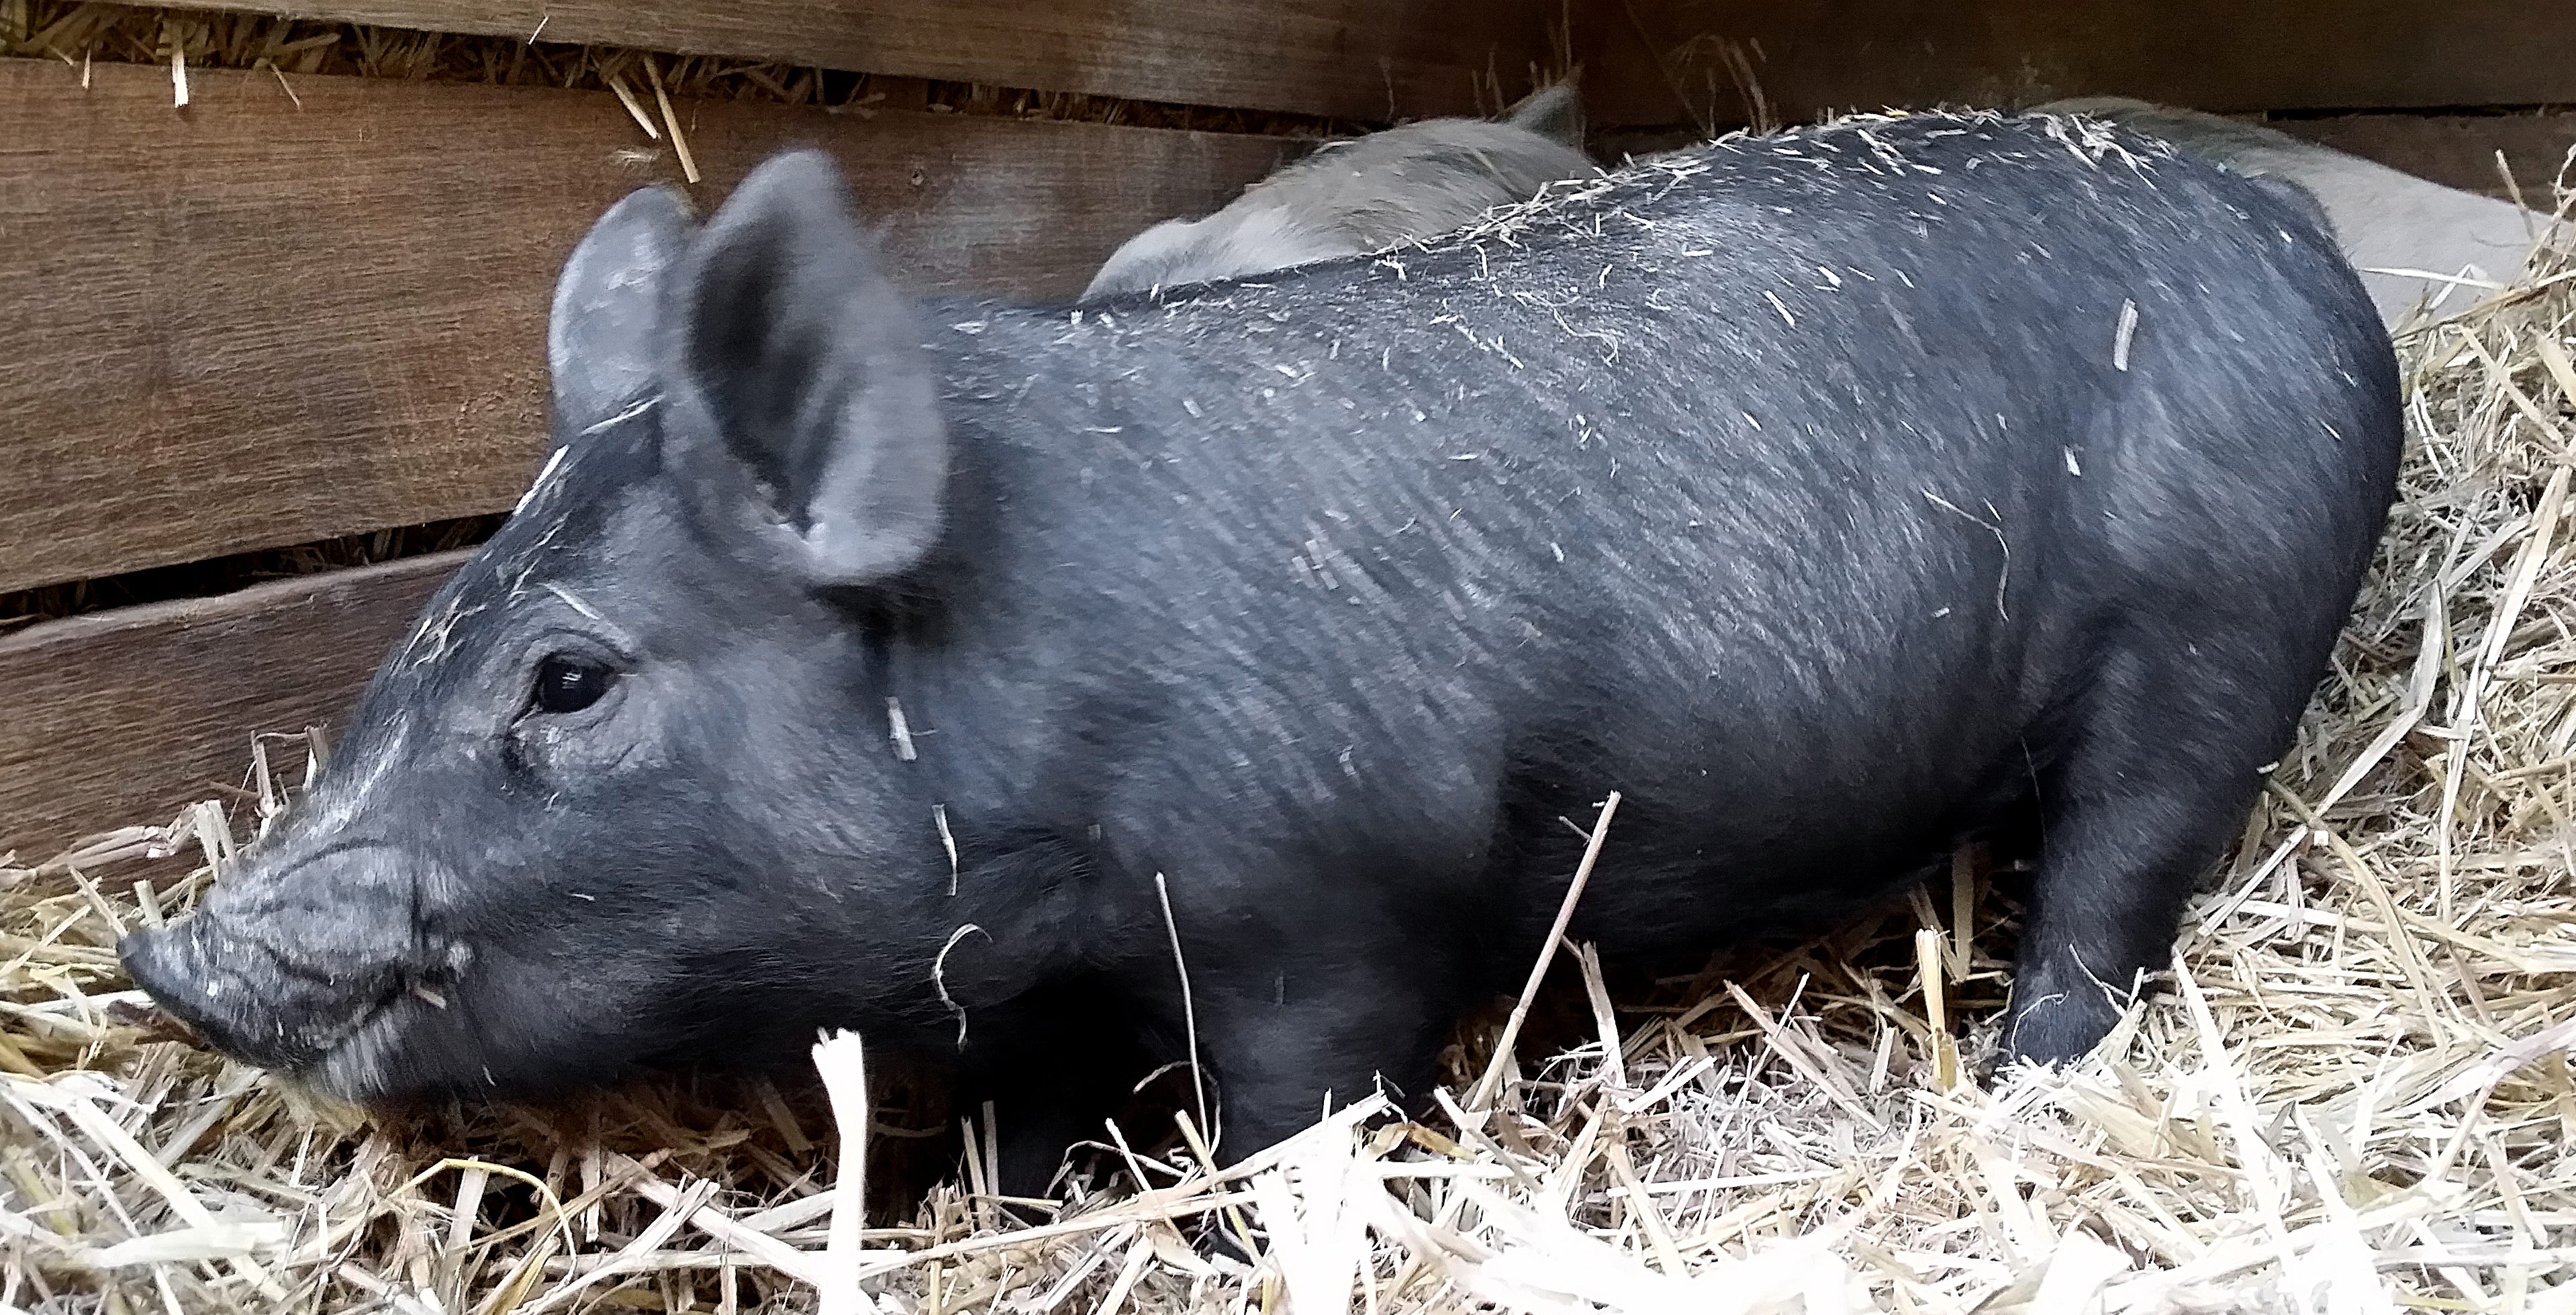
I must confess I already have a favourite. Here she is. I think I will call her Midnight. She looks just like her mum.
Finally, after several apples, they relaxed and began to explore and enjoy their new home. Eventually they came close enough to us that we could see they had lice, so we put plenty of diatomaceous earth on them, and in their house. Last time we had pigs they also came with free bonus lice. Three days after the diatomaceous earth treatment they had none. However we do put diatomaceous earth in their house regularly. It is composed of the fossilised remains of diatoms, a group of algae with the unique feature that they are enclosed within a cell wall made of silica.
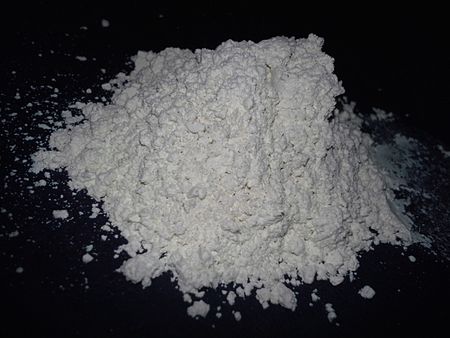
There are two types of diatomaceous earth, food grade and industrial. The former is so named as it is totally edible. The latter is used in industrial filtration processes and some swimming pool filters and is totally not edible. The food grade has a wide range of uses for many animals, including humans. We put it in our grains stores to prevent insect attack. This means it coats the grain so when animals eat the grain they ingest the diatomaceous earth as well. We also dust our hens’ houses with it to prevent lice and mites. As a result our birds never get scaly leg mite.
Diatomaceous earth is a mechanical rather than a chemical method of controlling insects [2]. It has a two fold method of killing insects. Firstly it is composed of very sharp, small pieces. Insects have a layer of lipids on their carapaces to help them retain moisture. Diatomaceous earth scratches this layer and as a result moisture escapes, making the insects dehydrated. Secondly diatomaceous earth is very absorbent, for which reason it is used in kitty litter, and this adds to the insects’ dehydration sufficiently that they die. Because it is not toxic one doesn’t need to be bothered about it building up in the environment.
Until recently it was quite hard to get hold of here in Tasmania and we had to buy it in bulk from Fossil Power, although it costs as much for shipping as for the product from them. Recently it has become available here at Riverbend Farm in Margate.
When one gets pigs it is vitally important to keep them completely contained for a few days until they realise they live here now. Otherwise you may never see them again. Stout fencing is required. We keep them shut in the pig house for four days and then let them out into a 10 metre by 12 metre fenced yard in the middle of a paddock. This yard has electric fence, one strand at six inches off the ground and another at eighteen inches off the ground, on the inside of a wire mesh fence. This has proved to keep pigs contained. Once they get too big for that area we open the gate and let them out into the paddock.
Our goal is to try to create an environment they won’t want to leave, so we provide them plenty of space, access to pasture, a comfortable, dry house that is raised off the ground and we make a special effort to hang out with them and play. This is no work at all as they are incredibly funny and intelligent. They will chase a thrown ball, though they haven’t got the knack of bringing it back to us so we can throw it again. We also make sure they know we are the source of yummy foods so they will come when we call. Having said all this though they are very wilful and determined animals. They will charge electric fences to get through them even though they know they will get zapped so it isn’t wise, at least at first, to rely only on electric fences to keep them in.
One of the reasons it is important to keep pigs contained is that if they eat meat they can get the parasite trichinosis, which can be passed on to humans who eat them. For this reason it is illegal to feed meat to pigs in Australia [3].
We will be feeding them a crushed grain muesli made by Tasmanian Seedhouse [4], who are a local feed supplier who grow their own grains. When grain is crushed it looses nutrients quickly, which is why we choose a local supplier. We soak it in milk to start with as milk is $1 per litre. This feed is 16% protein, 2% fat and 7% fibre and contains the following:
Barley, Wheat, Triticale, Peas, Soy, Salt, Dical Phosphate, Lime, Canola Oil, Lysine, Threonine, Methionine, A (retinol), D3 (Cholecalciferol), E (α-tocopherol), K (Menadione), B1 (Thiamin), B2 (Riboflavin), B3 (Niacin), B5 (Pantothenate), B6 (Pyridoxine), B9 (Folate) B12, (Cyanocobolamin), H (Biotin), Calcium (Ca), Phosphorus (P), Sodium (Na), Chlorine (Cl), Zinc (Zn), Copper (Cu), Iron (Fe), Manganese (Mn), Iodine (I), Selenium (Se), Cobalt (Co).
It is designed as a whole feed, but these guys will be getting out onto pasture pretty quickly. Pigs can do very well indeed on pasture alone [5], although young pigs do need their diet supplemented as they cannot eat enough vegetable matter to provide them all the nutrients they require. Also, all our apple trees have ripe fruit on them at this time of year so things are looking good for the pigs.
- Scientists find missing link between whale and its closest relative, the hippo.
- Diatomaceous earth under the microscope by Dr. Stuart B. Hill.
- Don’t feed food scraps (swill) to pigs.
- Tasmanian Seedhouse
- Pastured pigs.

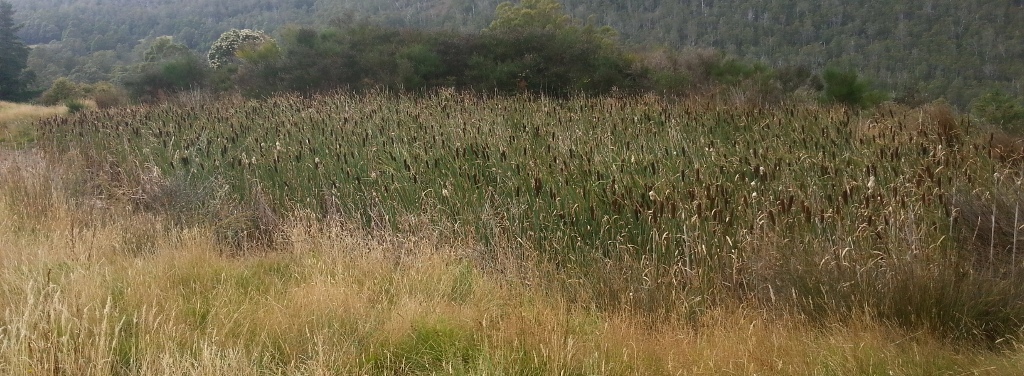 We figured either the dam was leaking, or the bulrushes were drinking up the water. Seeing as there wasn’t any water in the dam, I though it’d be an ideal time to pull the bulrushes out; relatively easy access, and once we get some more rain through winter, we’ll be able to figure out what the dam is doing one way or another. Having pulled out a small patch of bulrushes over the course of ten minutes or so, I thought to myself: how hard could it be? (The astute observer will note that this is a weak form of the deadly old rhetorical “what could possibly go wrong?”)
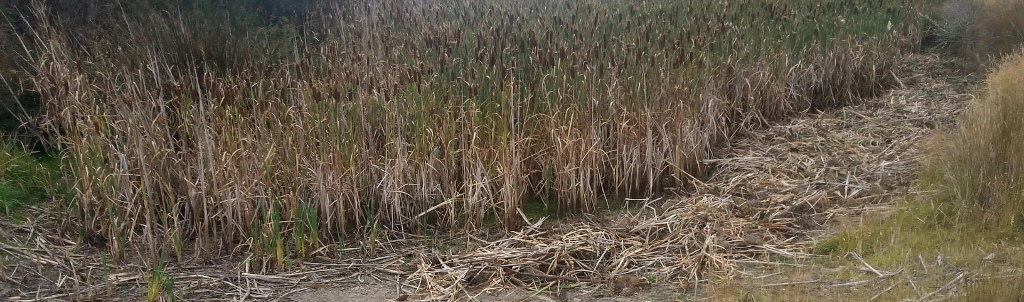 It’s important to note that we don’t own any heavy machinery suitable for this task, so the entire job was done solo, by hand, in gumboots and gloves. After about a week, it was starting to look like an impressive impact (note – this photo is facing back the opposite direction from the previous photo):
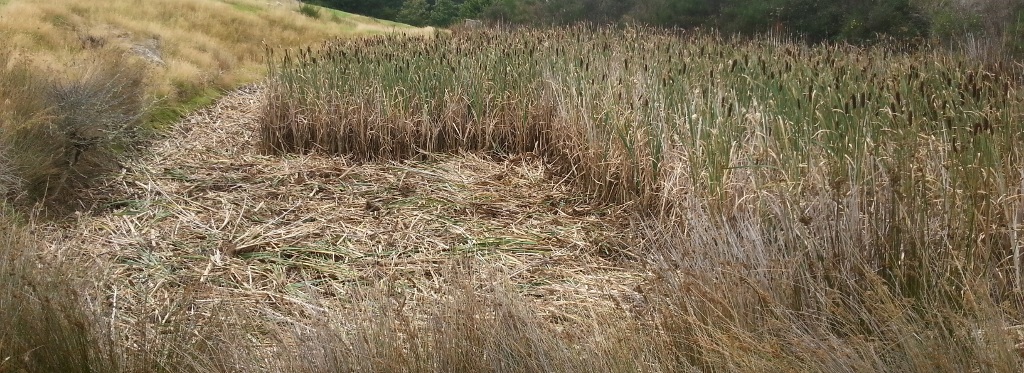 After two weeks I got bored with dropping flat areas, and decided to make a few paths to liven things up:
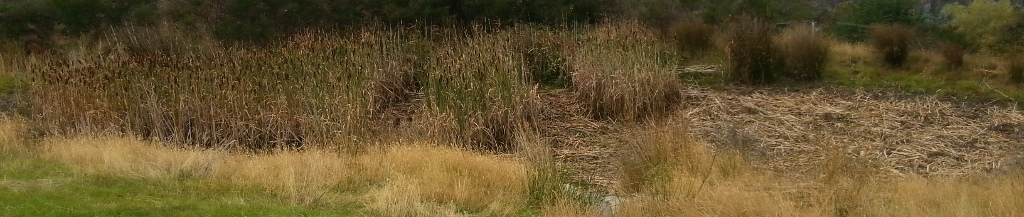 After about three weeks, I had the whole lot down, if you ignore a couple of small patches above dam height that are embedded in blackberries:
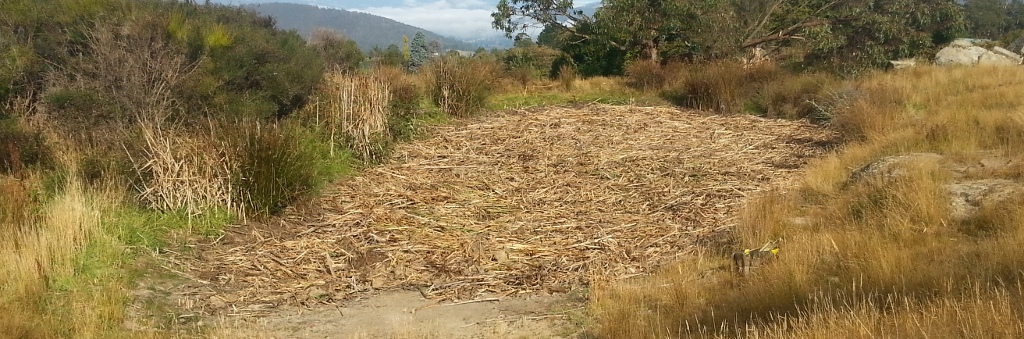 The next task was to get all that crap out of the dam. Again, handwork (just drag the damn bulrushes outta there), but I did find a heavy rake useful. Later, after the rake broke, I resorted to a hoe for lighter dragging. Here’s the middle of the dam after a few days:
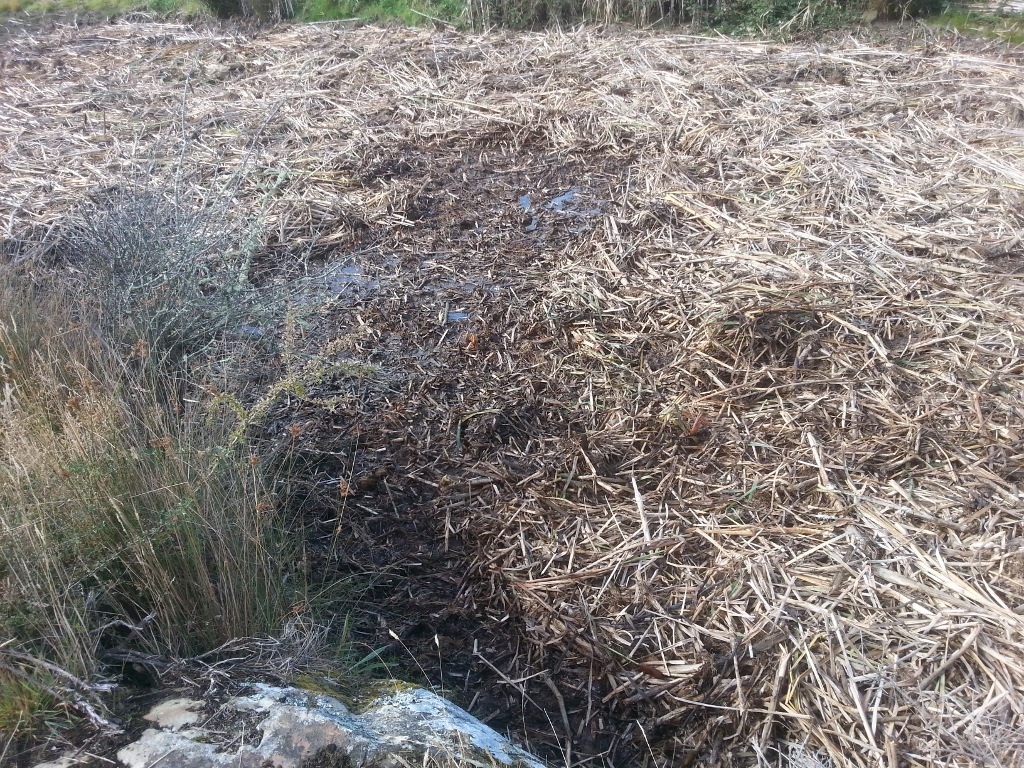 And after about another week:
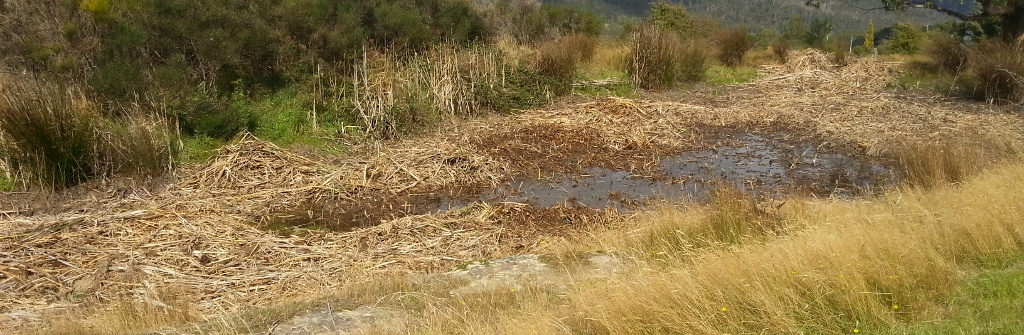 There were frogs and spiders. I managed to photograph one of the frogs:
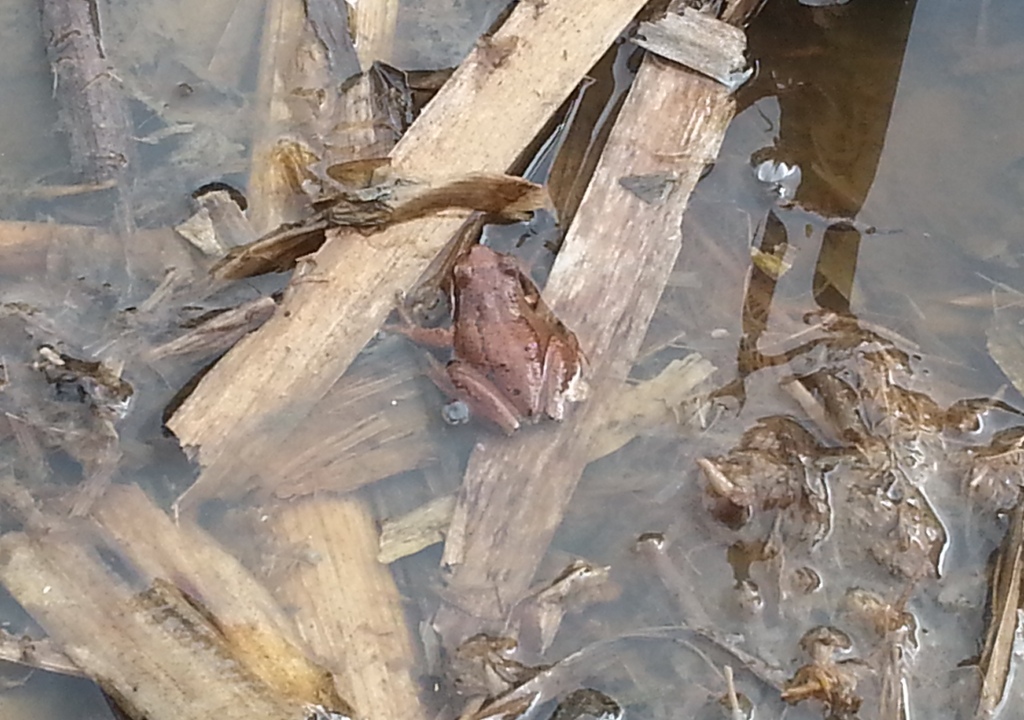 Finally, after seven weeks in total:
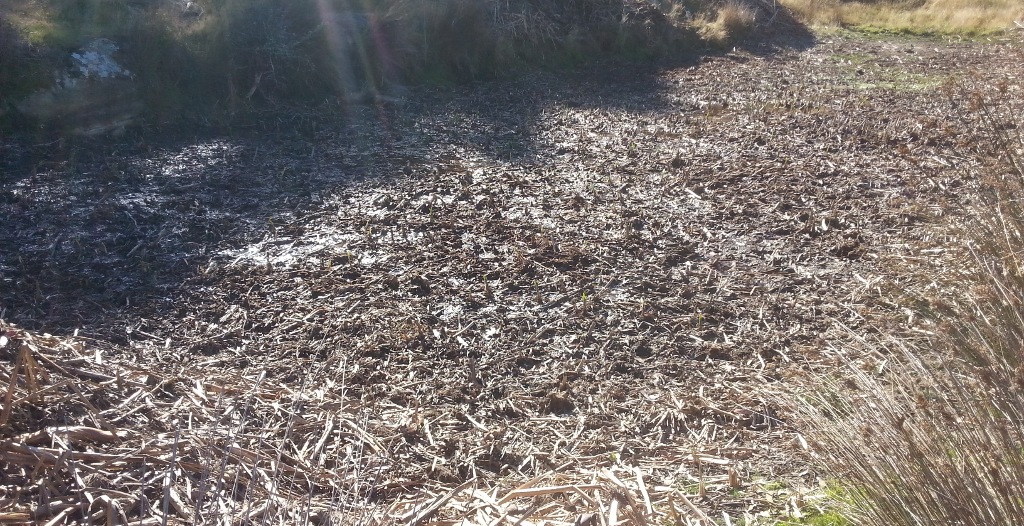
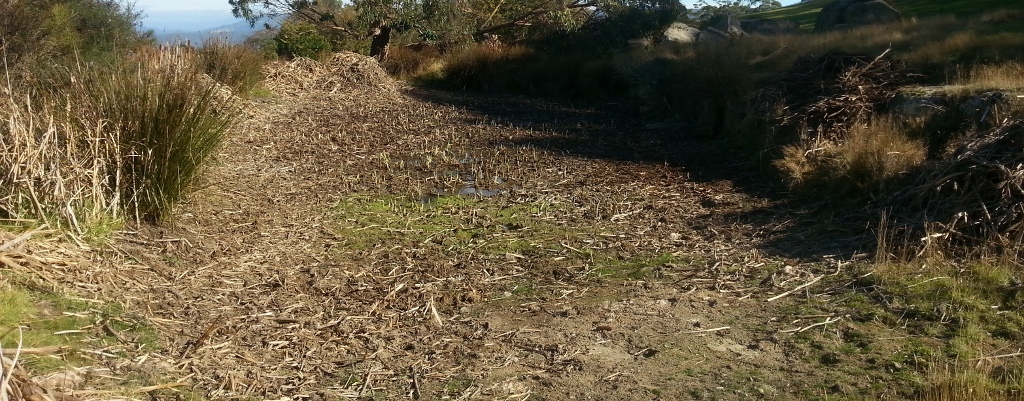 It’s basically clear now; there’s a smattering of bulrushes attempting to regrow, but I have high hopes that it should at least be manageable now if we keep on top of it.
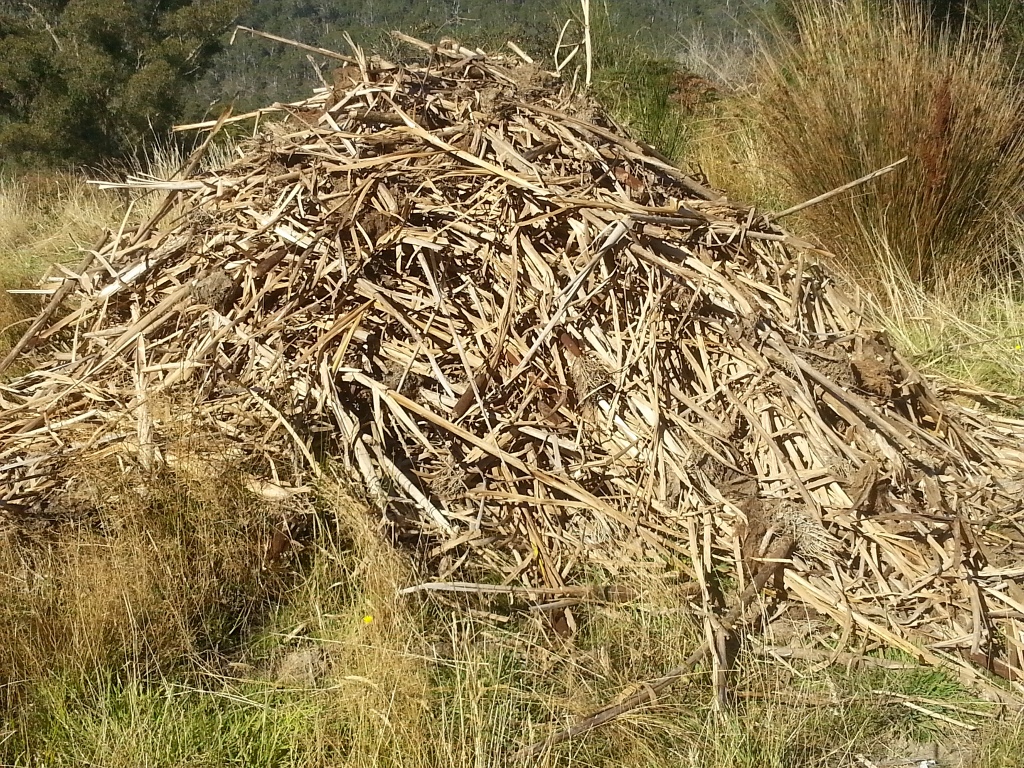 Possibly we should investigate basket weaving.